Picture Postcard Workflow: The Helmholtz-Kohlrausch action explored
The most difficult workflow step?
The name alone is difficult. Try to type “Helmholtz-Kohlrausch” at once, without mistakes and without looking at an example. Then try to pronounce it (of course native German-speaking people will find this easy). I myself find the name so annoying that from now on I solely refer to it as H-K.
Marco Olivotto, Photoshop instructor and Dan Margulis’ counterpart in Italy, wrote the documentation for the H-K action on the PPW panel. Thinking back about this, he notes in this very interesting article: “I was in the middle of writing what I consider the most difficult article I ever put together.” And a few sentences further down: “When I objected that I didn’t know very much about the Helmholtz-Kohlrausch effect I got the reply that I was in good company, because nobody knows that much about the subject.”
Well, what makes H-K so difficult then?
The Modern Photoshop Color Workflow (MPCW) book dedicates a full chapter (13) to the H-K action. It’s aptly titled “The Black Art of Color Enhancement”. Read it and you may find the process itself not that hard to understand. Let me capture the essence in one sentence: H-K darkens and desaturates duller image areas.
That’s about it! Only the purest colors remain untouched. The further away from that, the stronger the effect. (Well, of course neutrals cannot be desaturated, but you get the point.)
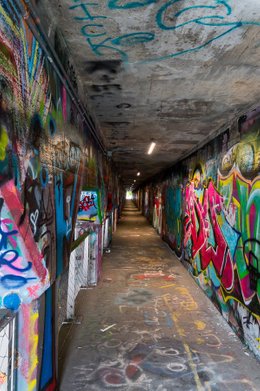
Krog Street Tunnel, Atlanta
The PPW Panel has a button conveniently labeled “H-K”. When pressed, a group consisting of two layers is created. One called “H-K Effect” does the darkening part. The other called “Color Only” does the desaturating part. Couldn’t be simpler, could it?
Simple, maybe, but why on earth would we do this? How does an image benefit from this darkening and desaturating? The answer: in some cases - not more than a small minority - the final result is better after having applied this action. The question then is, how do we know? The H-K action itself will rarely if ever improve an image. The advantage is only apparent after having completed the final PPW steps: better color distribution, more depth.
Now we’re arriving at the answer to our question. The retoucher needs to judge beforehand whether H-K will eventually be beneficial for the image under control. No doubt, that is the real difficulty of this step.
What's it all about?
Before I look further, let me tell something about the what and why of H-K. It's a visual effect, studied by two 19th-century scientists who gave their names to it. In short: the more saturated a color, the lighter we perceive it. Compare two reds with equal luminance, one bright and one dull, the bright red looks lighter. This has nothing to do with Photoshop, monitors or digital imaging: it’s a phenomenon that takes place in the human eye itself. See figure 1 for an example. The five color patches on the top row have equal luminance, but some look lighter than others. On the bottom row, they have been converted to greyscale.
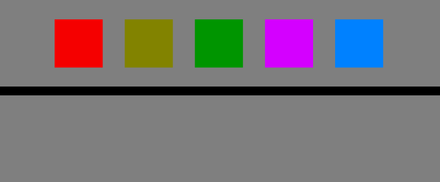
Figure 1. Five colors with equal luminance. Copied from wikipedia.
Back to Photoshop and the PPW: this is what the darkening (H-K Effect) layer is about. It simulates the H-K effect by darkening less saturated colors. Or wait… “simulates” is not the right word. The effect is already there, in every image that we look at – after all, it takes place in our eyes. The action exaggerates it. It makes less saturated colors even darker than we already perceive them. And why? Well, for some images it seems to add depth. That sounds a little vague, but more about it later.
The other layer, Color Only, is a different beast. As far as I understand, it has little or nothing to do with the scientific H-K effect. The rationale for this part can be found in the PPW itself. This layer tries to redistribute color intensity. Remember that right after H-K follow the color enhancement steps. Color Boost in particular has the bad habit of making just everything very colorful. There may be a desire to discriminate: bring out only the most colorful things and restrain the rest. H-K Color Only accomplishes exactly that.
If the two layers have so seemingly different purposes, why then combine them in one action?
The short answer is that in many cases (but definitely not always), both layers work together to reach the intended effect. The long answer follows below.
Zooming in on image types
Chapter 13 of the MPCW book contains a list of image types that would classify for a successful H-K treatment. Just for your information, I repeat that list here (highly condensed):
- Pictures full of semi-vivid color
- Pictures that showcase areas of intense color
- Pictures in which cheerful colors are unwelcome
- Pictures containing really brilliant color
- Pictures that are dominated by just one color
- Pictures with a subject that has limited room to change color
While preparing this article, I tried various images that belong to at least one of the above. I must say, I got mixed results. For some images, H-K worked, for others it didn’t. In some cases, I got results that were better in one image area and worse in another.
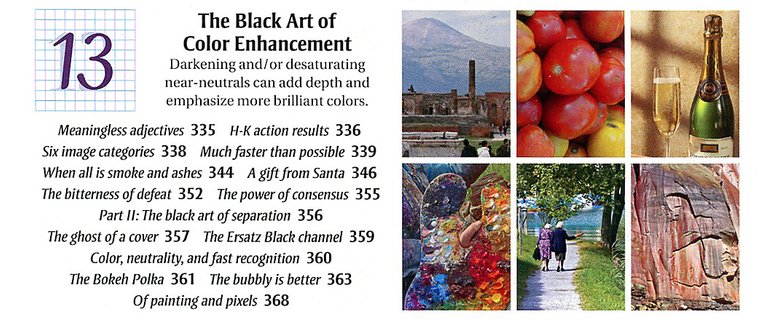
Figure 2. Chapter 13 from the MPCW book's Table of Contents
I believe it makes sense, for good understanding what H-K does and why it works in certain cases, to view the two layers as separate entities with different objectives. Sometimes one layer does the trick, sometimes the other, and sometimes both. I will show two examples where the action is particularly effective, and one where it isn’t. In each case, I try to explain what happens and which role each of the layers has played.
Example 1
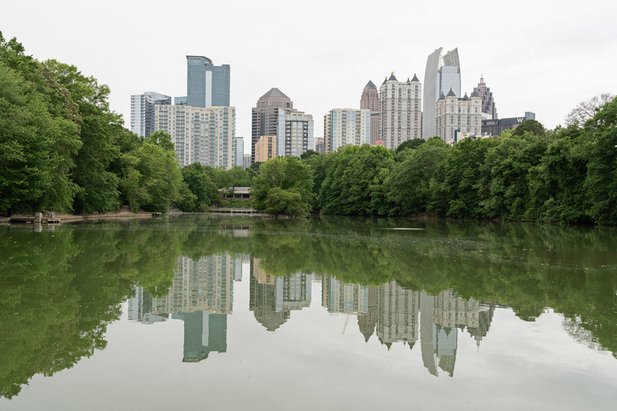
Figure 3. Example photograph 1
Figure 3 brings me back to Atlanta which I happened to visit a few weeks ago. This photograph was taken from Piedmont Park, and this skyline view is one of the photographic highlights of the city. The strength of the image is not in the skyscrapers only. We should strive to enhance the greens as well.
The version of figure 3 has already been corrected for color and shows good contrast. What’s left to do is MMM and/or Color Boost. As the greens are already quite colorful, this is a case for applying H-K. To keep the comparison simple, I created two versions: one is MMM + Color Boost applied on figure 3 directly, using a selection of the greenery. Opacity of Color Boost reduced to 10%. The other is the same, but running H-K first. On that version, there was no need to reduce the Color Boost opacity.
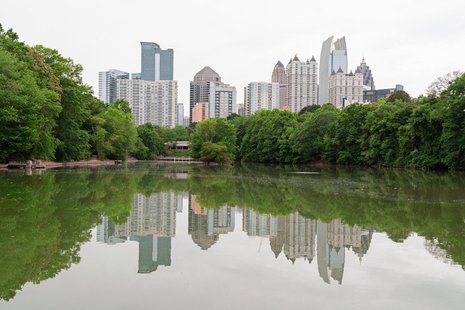
Figure 4. Processed without H-K applied
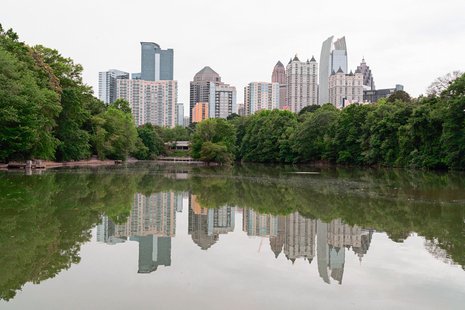
Figure 5. Processed with H-K applied
Figures 4 and 5 are the result. I find the difference striking. The trees in figure 5 look more realistic, their color is more lively, and they take less attention away from the buildings. So why did it work so well here? The defining factor is indubitably the Color Only layer, and the defining image area is the greenery.
This is what I think happens. In the original, figure 3, the trees are already pretty colorful – about as much as I'd want them to be. To produce figure 4, I applied MMM first, then Color Boost. MMM brought variation into an area that was already colorful enough. So some of it got more colorful than desired, some less so. After that, Color Boost could not do anything but make most of the greenery too colorful. And it shows. In the version of figure 5, H-K made the greens duller. MMM again brought variation, forcing some of it even towards neutrality. This left room for Color Boost to provide a colorful version with much more variation than was possible in the other variant. I would say, figure 5 is hardly more colorful in the trees than the original, but it has a lot more color variation.

Figure 6. Processed with full H-K (same as figure 5)
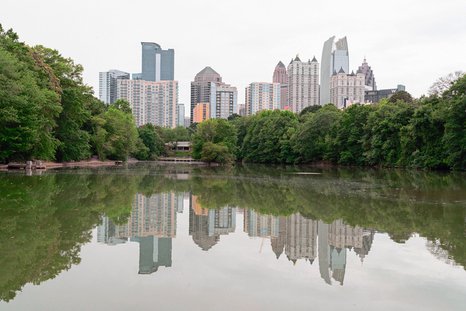
Figure 7. Processed without the darkening part of H-K
Figure 7 is another version where I followed the procedure of figure 5, but I removed the H-K Effect layer, taking out the darkening part. Better than figure 5 (repeated here as figure 6 for easy comparison)? I don’t know. Maybe slightly better trees, but a bit bleaker buildings. No obvious winner. It’s the desaturation of the greens that does it.
Example 2
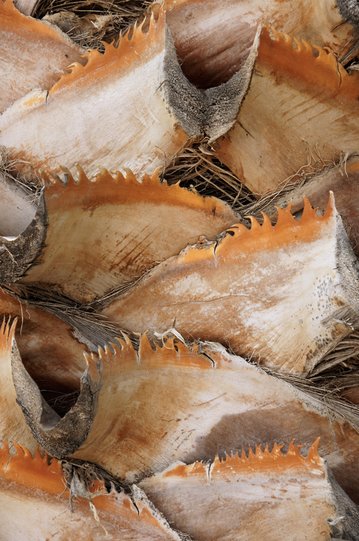
Figure 8. Example photograph 2
Figure 8 is a close-up of a palm tree trunk. The idea is that we bring out color, but more in the orange crenated edges than in the interior parts. Also, this is an image where we expect to create more depth by applying the H-K action.
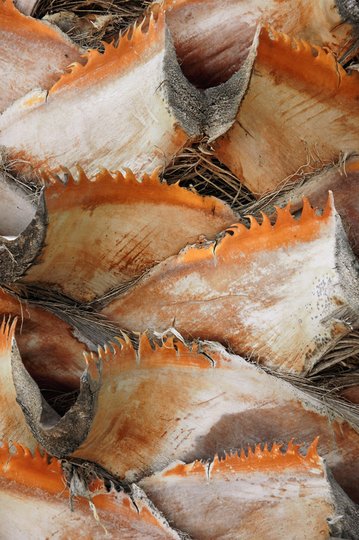
Figure 9. Processed without H-K
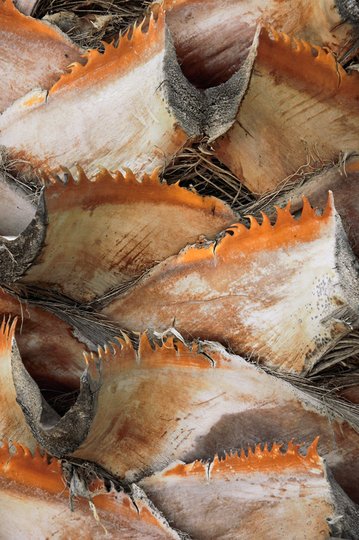
Figure 10. Processed with H-K
Figure 9 is the result of applying MMM only, based on the full image selection. Adding even a slight bit of Color Boost made the whole too colorful. This is acceptable.
Figure 10 applies H-K first, and then MMM and Color Boost in 10% opacity. Definitely better if you ask me, although not as obvious as in the previous example. The orange edges are better accentuated because the less saturated parts are kept more neutral and somewhat darker. As desired, the H-K action adds depth. The darker parts seem to recede more in figure 10 than they do in figure 9.
Now the question is, which of the two H-K layers contributes most to this effect? Below are two more versions.
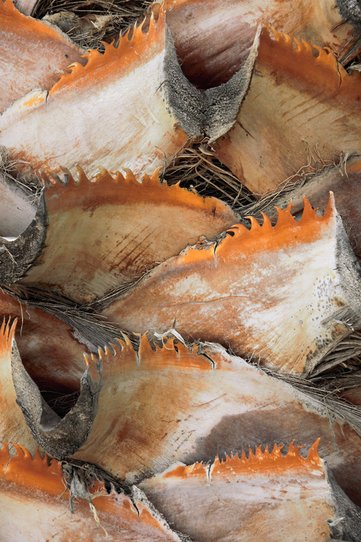
Figure 11. Processed with H-K without the darkening part
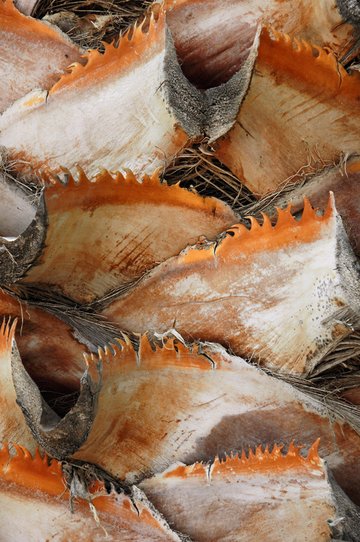
Figure 12. Processed with H-K without the Color part
- In figure 11, I applied H-K but only the Color layer. After that, MMM + CB 10%.
- Figure 12 is the result of applying the Luminosity layer of H-K only, followed by MMM only.
So which is superior? I’m really not sure. Figure 12 is slightly too colorful. Figure 11 is too bland. Both are worse than figure 10 in which both effects were applied. It seems that it’s the combination of darkening and desaturating that makes the version of figure 10 successful. Both layers have to contribute, otherwise the result doesn’t work so well.
Note that the sense of depth is the key to success here, not the color variation as in example 1.
Example 3
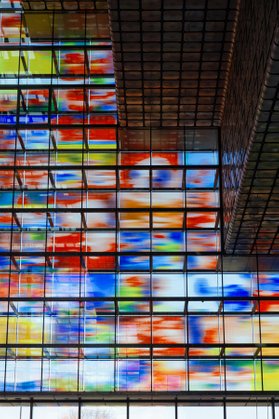
Figure 13. Example photograph 3
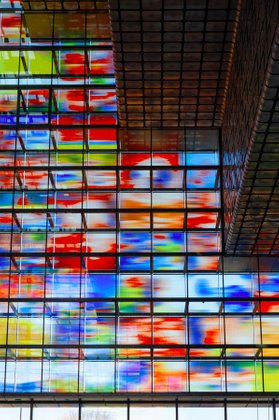
Figure 14. Processed without H-K
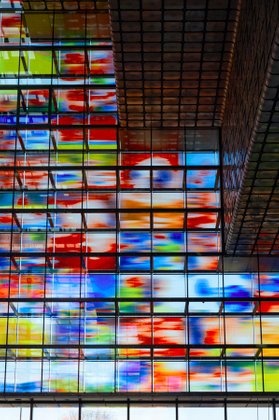
Figure 15. Processed with H-K
Look at figure 13. A lot of color, semi-vivid and vivid, a seemingly good candidate for H-K.
- Figure 14 is figure 13 plus MMM + CB, Color Boost toned down to 15%.
- Figure 15 is figure 13 plus H-K plus MMM + CB, all in default opacities.
Which is better? I say: figure 14, but you may disagree. Maybe we should call it a draw. The H-K action darkened some of the colors (mainly the reds) - but that didn't improve the final result at all.
The question is: why?
The problem with the aforementioned six categories from the book, is that they don't always specify what the retoucher wants to accomplish with an image. In my opinion, that’s a critical part of the assessment. To say that colorful images may apply, is not enough. If we deal with a colorful image, but the color is already right and no further variation or intensifying is needed, then how could H-K help?
This is what happens with example 3. The color is there, but it's just a bunch of flat squares. Subtle color variation like MMM delivers won't help. Making some colors less intense, or darker, doesn't help either. Depth plays no role here, at least not in the sense that neutrals should recede from more colorful areas.
Conclusions
As far as my experience goes, the categories of examples 1 and 2 are the ones where H-K works in a predictable way. This may help you as a retoucher, like it helps me now that I have this clear. Don't understand me wrong, H-K may be beneficial for other image types as well. The two categories are by no means exhaustive. Experimentation may pay off. But in the two cases H-K is practically a no-brainer. This is so important that I will list my conclusions here as a sort of summary of this article.
So, H-K is very likely effective when one of the following conditions is met:
- In at least one important area of the image, color saturation is about right but more variation is essential.
- The image contains brightly colored items or areas that need to stand out against more neutral areas.
In the first case, the Color Only layer of H-K does the critical work. Whether the other layer needs to be retained depends on the rest of the image. A good hint is that MMM Finetuned may work well here, using a selection that represents the involved area.
In the second case, both H-K layers work together to give the desired result. Here, Color Boost may be an effective continuation, because it emphasizes the colored elements against the more neutral remainder of the image.
I agree with Dan Margulis, Marco Olivotto and others that understanding, let alone mastering the H-K action is difficult. I just hope that the above analysis provides a step towards mastership. And of course, if you have additional suggestions or ideas, don't hesitate to let me know through my contact page!
Gerald Bakker, 10 June 2018
Thanks to Erik Gordebeke for his valuable comments on an earlier version of this article.
Picture Postcard Workflow