Picture Postcard Workflow and raw processing: Clarity and Dehaze
The leftovers
About a year ago I started to consider writing about raw processing in combination with the Picture Postcard Workflow. Back then I thought that one article would be enough. Just a comparison between a conservatively and a heavily raw-processed image, both taken through the PPW. With a conclusion: see, better not do an overenthousiastic raw conversion, keep it flat and the end result will be superior.
As it turned out, just an introduction already gave enough material for a full article. And from then on: each of white balance, sharpening, noise reduction, color and contrast warranted a separate discussion. The current article is the final piece of the series, and deals with two leftovers from the previous one: clarity and dehaze. There are some important similarities between these: both come in the Camera Raw module only, and both aim to enhance contrast. (Dehaze also affects color, more about this later.) Let’s briefly look at the two effects in more detail.
Clarity
Clarity increases local contrast, a bit like sharpening. But where sharpening operates within a small radius only, a few pixels at most, clarity affects a wider area. Sharpening strengthens already existing edges. Clarity brings out texture. It’s not easy to explain in words, but you probably know what I mean.
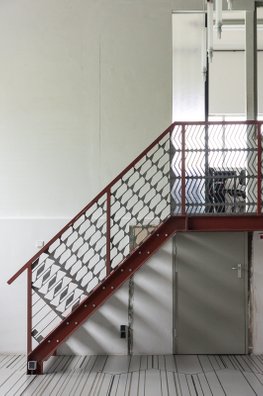
Red stairs
Clarity is nice. Arguably more than 90% of all images benefit from a moderate application of it. I once read the following description: “Clarity is one part tone mapping, one part sharpening, one part magic.” It is similar to (but not the same as) high radius-low amount sharpening. See figure 1 below for an example of this. From left to right: original image, image with USM 60% - 30px and image with Clarity +75.
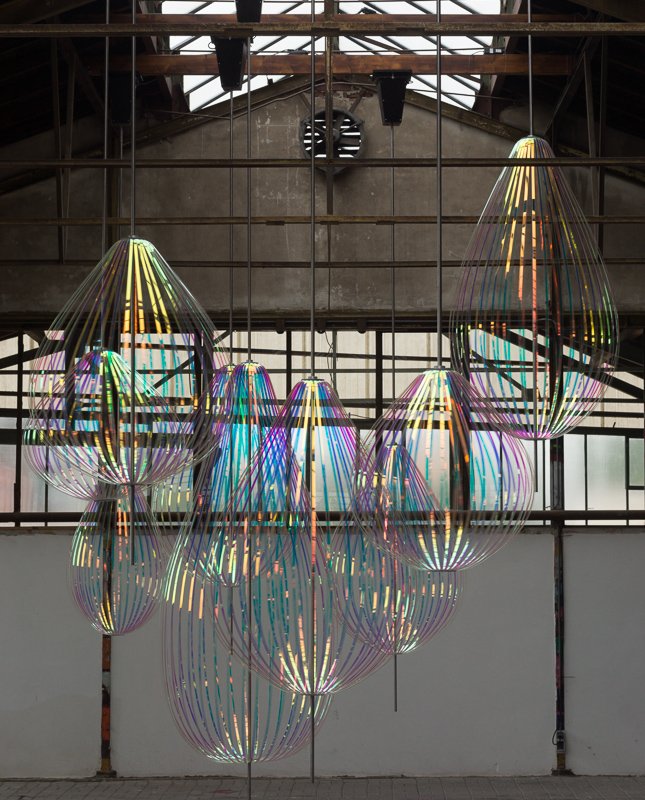
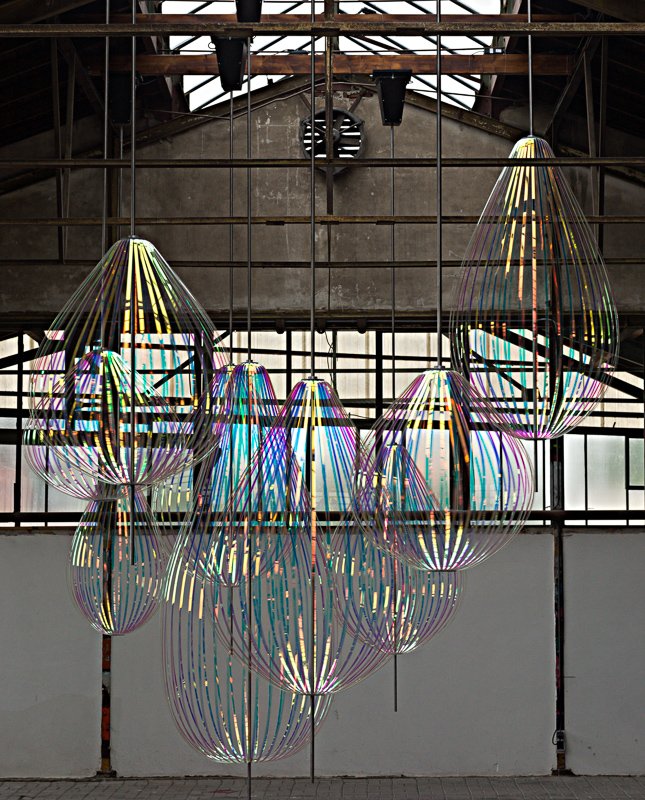
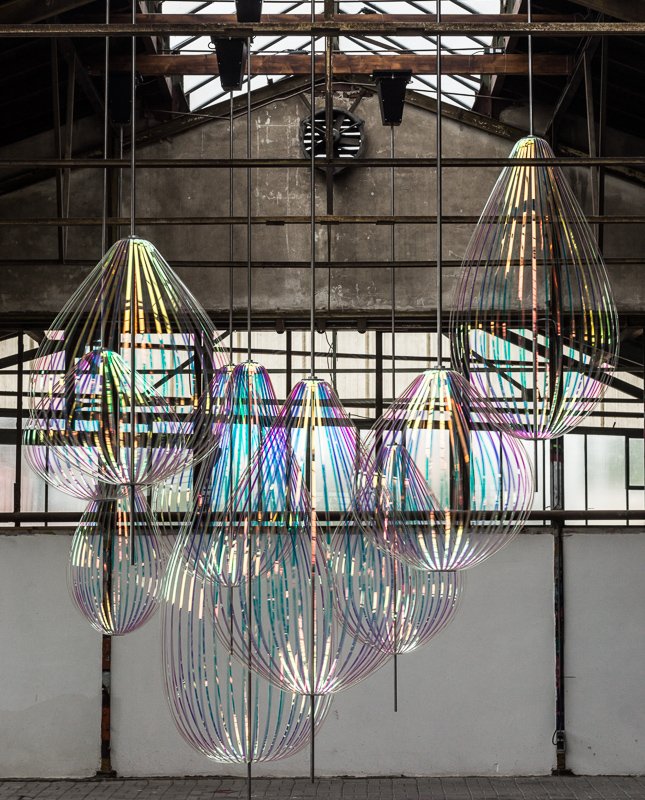
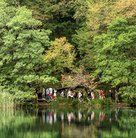
Figure 1. One image in three versions: original, USM 60% - 30px and Clarity +75
To better spot the differences, see one fragment of the three versions in figure 2. Note how the second version (USM) gives a harder contrast but the third version (Clarity) better brings out fine texture.
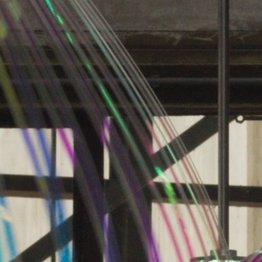
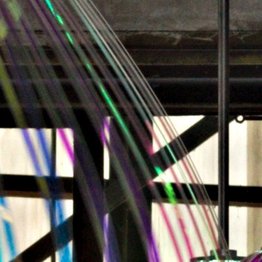
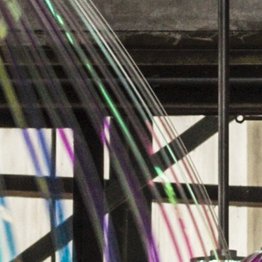
Figure 2. One fragment of each of the three versions of figure 1.
Dehaze
Dehaze is far more specialized. Not accidentally, it is listed under Effects, while Clarity can be found on the Basic tab. Dehaze is supposed to increase contrast, darkness and saturation in “hazy” image areas. In my own experience, it’s hit-and-miss: often does what it should do, sometimes not. Don’t try it on a non-hazy image, that’s likely to give more damage than benefit.
Dehaze is even more magic than Clarity, although there seems to be a solid mathematical background for it. The main difficulty is to distinguish hazy areas from other areas that are just lacking contrast. It has a tendency to severely darken blue skies for example.
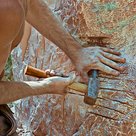
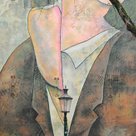
See figure 3 for an example of what Dehaze can do.
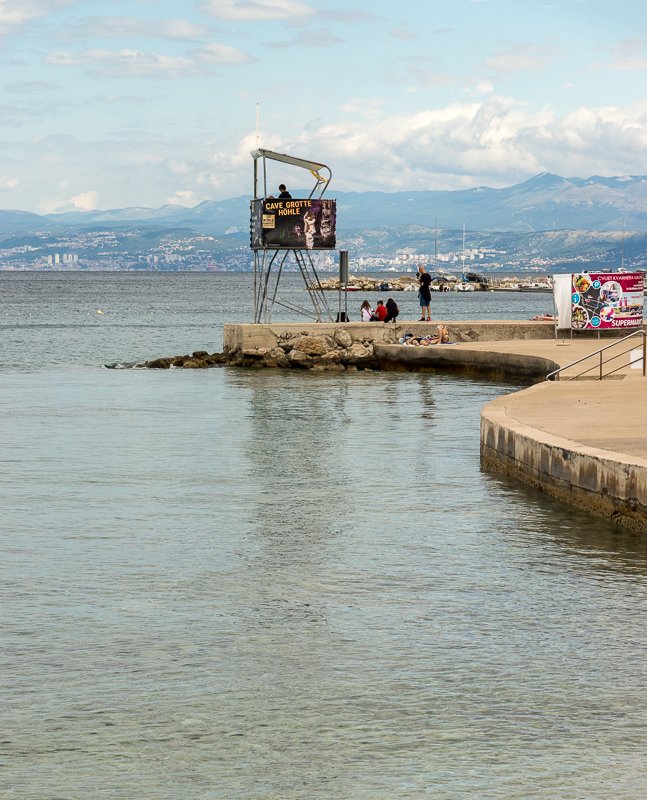
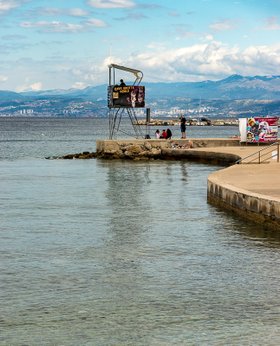
Figure 3. Original image and Dehaze +30 applied.
The first question
Like in the previous articles in the raw series, here is the question for which I search an answer: is it recommendable to apply the control (in this case, clarity and/or dehaze) during the raw phase, or should we leave it alone? Does it help to get a better end result, or does it hinder an effective application of the PPW?
Mind you - the question this time is not whether to apply the two controls, or in which cases. Their usefulness is beyond doubt. If you feel that a bit of Clarity or Dehaze improves your image, don’t hesitate to use them. The question is when: during the raw processing phase or later.
Yes, later… because this is the choice we can make, at least since the introduction of Photoshop CC. From that version on, Photoshop proper offers the Camera Raw filter, enabling users to open the ACR window after the raw conversion phase has been finished. So for any adjustment, filter, effect in Camera Raw, you have the choice to use it during the raw phase (in our case, before start of the PPW) or anywhere later.
If you ask me, using the ACR controls as a filter (so: not during the raw phase but later) has two important advantages:
- It gives you all the layer controls that Photoshop provides: masks, opacities plus all sorts of blending options
- You have the choice to apply the effect at the beginning, halfway or at the end of your workflow
The second question
Before we draw a premature conclusion, there is another important aspect to consider. After all, a raw image file is more potent than a processed image file – think of its wider dynamic range and not yet fixed white balance. The point then is, does the availability of raw data give a better starting point for the filter? Could either Clarity or Dehaze be more effective on a raw file than on a processed file?
The best way to answer this question is to try it out on an example image.

Figure 4. Original image
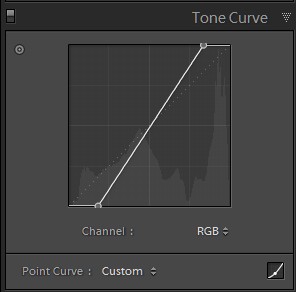
Figure 5. Curve applied

Figure 6. Result
Figure 4 is an image with proper contrast, good range but nothing blown out, to which I applied an aggressive curve. See figure 5 for the curve and figure 6 for the result. Parts of the image are now white, parts are black. Yet, as we are still in the raw phase, this is only an intermediate state of affairs. All raw data is still there, hidden behind this extreme adjustment.
Next, I experimented with the Clarity and the Dehaze slider, respectively. For Clarity, whatever I try, I don’t see any significant white or black recovery. For Dehaze, I do see darks coming back, but only when the slider is moved left (meaning: increase the haze effect). No real advantage is obtained from the fact that we’re working on a raw file.
Color-wise, similar conclusions can be drawn from this simple experiment. Clarity doesn’t affect color, at least not significantly, and Dehaze only affects saturation. Do we have more room for that in a raw file compared to an 8-bit processed file? In theory: yes. But my view is, if the dehaze control puts so much saturation into the affected image areas, then we probably have gone too far with it.

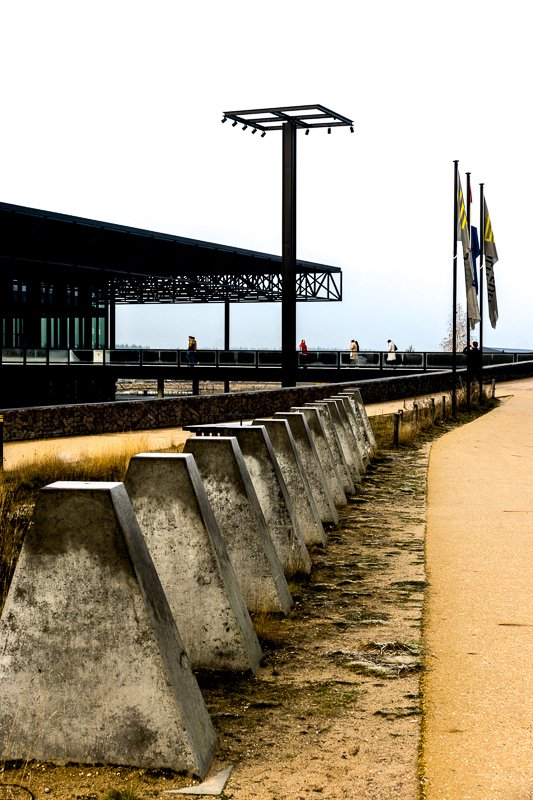
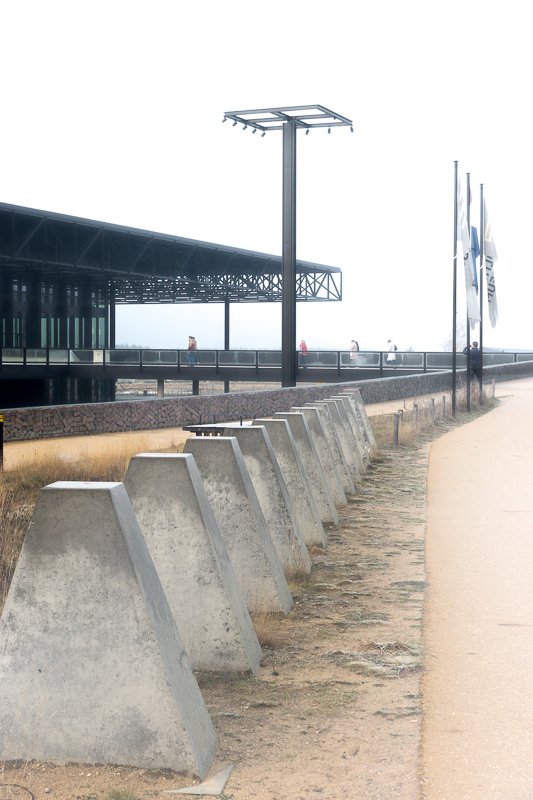
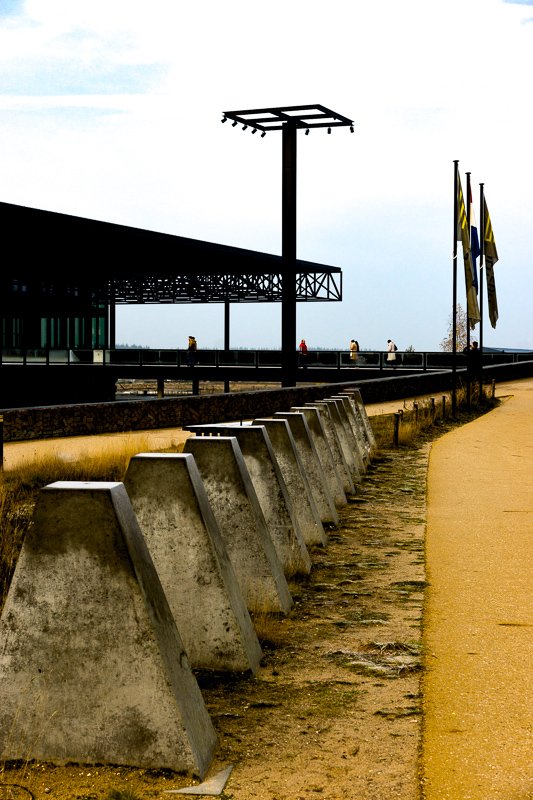
Figure 7. Clarity -50, Clarity +50, Dehaze -50 and Dehaze +50 applied to figure 6.
Figure 7 shows the two effects, applied in both directions (-50 and +50), applied to figure 6. Note that only Dehaze -50 can recover the blacks of the building. Not that we have a very useful adjustment here...
The third question
So the conclusion so far must be: no, there is no significant benefit to apply Clarity or Dehaze during the raw phase over doing it later using the Camera Raw filter. Yet, I repeat that these tools are valuable. One may wish to apply them anyway, supplementing the PPW steps. The question then is, where would they best fit in the workflow?
Again, I follow a theoretical approach.
First, Dehaze. Dehaze is mostly contrast and saturation. It enhances image areas that are overly flat. Sounds familiar? I believe it’s in the same league as the “Darken Sky” step. If you want to run a dehaze, do it there, right after the hammer steps. Also, given the saturation boost that Dehaze gives, it should be invoked only when we are sure to have removed any color casts (step 1 of the PPW).
Next, Clarity. I see Clarity as mostly related to sharpening. As such, it should be postponed to the end of the workflow. The PPW sharpening action already contains the Hiraloam layers that have a similar effect to what Clarity does. If you need more, fine, finish the sharpening, reconvert to RGB, apply the Camera Raw filter and add clarity to taste.
The recommendations
Most of the above is theoretical discussion. I have no time to try everything out. If you disagree with my conclusions and have good examples supporting that, please tell me!
Until then, I stick to the following recommendations.
If you use Photoshop CC or later:
- Better not apply Dehaze or Clarity during the raw conversion phase
- If the image asks for a Dehaze, I suggest to run it – by means of the Camera Raw filter – at the end of the Contrast phase of the PPW
- A better moment to apply Clarity is at the end of the workflow, right before or right after conventional sharpening
If you use Photoshop CS6 or earlier:
- Dehaze is not available at all
- Clarity is only available during the raw conversion phase. For images that lack local contrast, it’s ok to add some of it. Otherwise: better avoid it and stick to some hiraloam sharpening at the end of the process
This ends my “raw and PPW” series. To be honest, I learned a lot myself from writing these seven articles. The way I process my raw images now is different from a year ago, as I apply myself what I found out. I just hope you learned from the series as much as I did...
Gerald Bakker, 25 May 2017
Related articles

Picture Postcard Workflow