Picture Postcard Workflow: An action to reduce Bigger Hammer sky halos
A premature action
Last December I announced an action in the Yahoo Applied Color Theory Forum that I called “Reduce BH sky halos”. Back then, I thought this action was pretty cool, smart and ground-breaking. Many people would be highly interested, so I assumed.
The truth is, I got no response at all. None on the forum and none otherwise. I don’t know how many people actually downloaded and used the action – presumably not many. The explanation for this lack of interest could be that people don’t experience many cases where the action may be useful.
But I suspect another, more likely reason for the lack of response: I was too quick uploading my action. It was, let me admit that straight away, not very good. Back then I thought it was the best I could come up with, but I was wrong. Fortunately, I found that out myself, simply by continuing to improve it.
By now I have a version that I believe is much better. Instead of going back to the ACT forum, I decided to write an article about it. That enables me to explain how the action works, give examples and show advantages and disadvantages.
The dreaded halos
First, let me outline the rationale for my action.
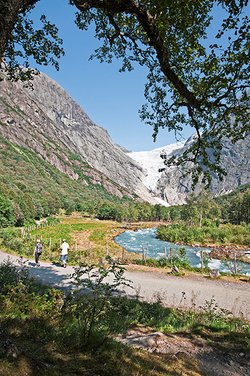
Norwegian landscape
Bigger Hammer (often abbreviated as BH) is a PPW action that is meant to improve highlight and/or shadow detail. It is both powerful and unreliable. Sometimes it is surprisingly beneficial, other times it sorely disappoints. And it has one infamous side effect: it can cause nasty halos, the consequence of a simple blurring mechanism that the action applies.
Roughly said, these halos occur where:
- A large enough light (but not white) area borders on a dark area
- Either of the sides (mostly the light one) has negligible texture
By far the most common occurrence of this is where anything dark touches a bright blue sky. Other cases do exist, but they are rare. Sky halos happen annoyingly often.
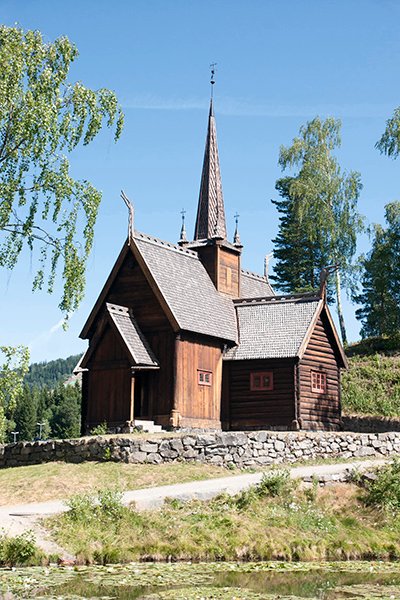
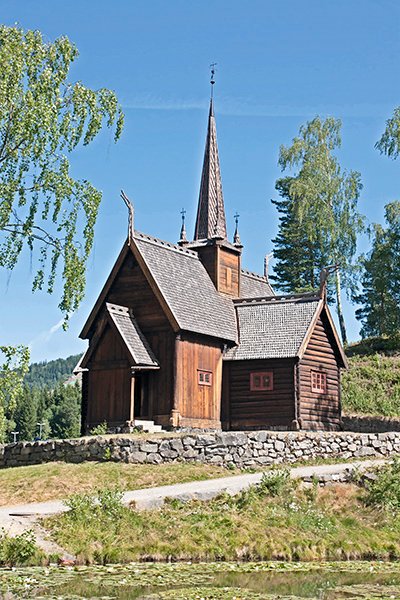

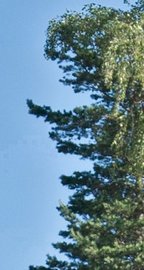
Figure 1. Original image
Figure 2. Bigger Hammer applied
Figure 3. Most pronounced halos
Figure 1 is an example of an image where such halos can be expected after a Bigger Hammer application. See figure 2 for the result, and figure 3 for two fragments where the halos are most pronounced. Some people would argue that these halos are unobtrusive for anyone who hasn’t been told about it, but I disagree. Everyone who looks carefully at this image will notice them, and conclude that something is not right. Ignoring the problem on the assumption that “no one will give my photo enough attention to notice these halos anyway” is plain stupid. And if the assumption would be true, I do notice these halos and they bug me. For myself at least, figure 2 is unacceptable.
The question then is, how to continue?
The workflow suggests several ways, of which the most usable are:
- Undo the action and try a different way to enhance highlight or shadow detail; or
- Use a layer called “Unblurred” – it’s there for this purpose only - and paint manually over the halos
Option one is a compromise. By trying a different action, the halo problem may go away, but any advantageous effect of Bigger Hammer may also get lost.
Option two is better in that respect, but it takes more time and is somewhat error-prone. Have a look at figure 2 again. The halos along the church sides are not so hard to remove, but there are problem areas along the trees as well. Carefully painting those away without leaving any traces is not so easy. I must confess, I rarely use this option. (But then, I am a bad painter.)
A better way
From the moment I was confronted with these halos, I started to think about a better way to get rid of them. Preferably by means of a Photoshop action, without unwanted side effects on other parts of the image. Well, I believe a fully automatic action that only removes halos and never does anything else is not possible, but I managed to come a long way. Below I elaborate on my solution.
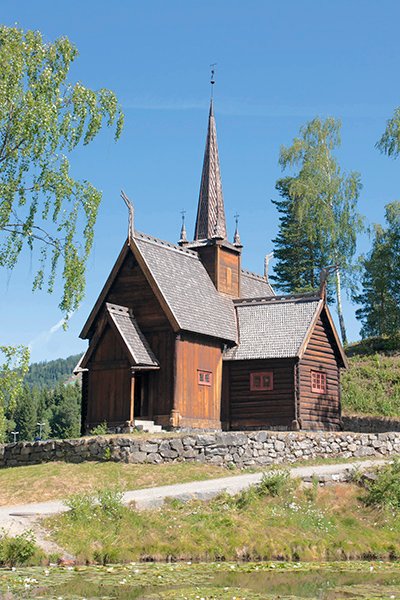
Figure 4. "Unblurred" version
We start from the layer called Unblurred. This layer is created as part of the Bigger Hammer action. By default, it comes with a black layer mask. Make it white and you will see a very flat version of your image (see figure 4). This is the Bigger Hammer applied without the blurring. (The flatness is why blurring is necessary. For more explanation of this, see my first article explaining the Bigger Hammer action.)
The Unblurred layer enables the user to get rid of halos by painting on the mask. One is supposed to whiten the mask wherever an unwanted halo is found. Our action may use that mechanism, but we need to find a suitable fill for the mask: something that is light in the halos and dark everywhere else. Obviously we don’t have that right away, but a good step in the right direction is the image’s blue channel. So why not begin our action like this:
- Activate the Unblurred layer
- First, duplicate this layer (ctrl-J). We keep the original Unblurred just in case it’s needed later
- Rename the duplicate “Reduce BH sky halos”
- Activate the mask of the new layer
- Image – Apply Image
Source Layer: Merged; Channel: Blue
Blending: Normal; Opacity: 100% - Hit OK
Figure 5 shows BH default (same as figure 2) and the result of our action so far.

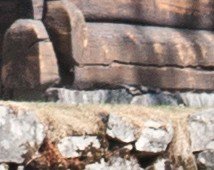
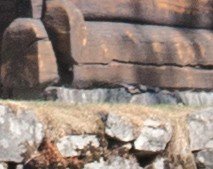
Figure 5. Bigger Hammer version and action's result so far
Figure 6. Fragments of each
Not bad at all, but not good either. The halos are gone (part one of our goal accomplished!) but so is a lot of the local contrast elsewhere, especially in the lighter areas. See figure 6 and note how the lighter spots in the top version have weakened in the bottom version. More work to do.
Let’s have a look at the mask. The sky is a light grey, the halos even lighter, most of the rest (but certainly not all) is darker. But the distinction light/dark is not strong enough. The sky, including the halos, should be lighter, other parts darker. (Note that having the sky itself included in the mask is no problem. The sky is so smooth that the blur action doesn’t affect it – hence, the unblur does neither.)
A simple way to improve the mask is thus to apply a curve that makes everything lighter than light grey white, and everything darker than middle grey black. See figure 7 for the current mask, the suggested curve and the new mask. The curve’s control points are: (127, 0) and (204, 255).
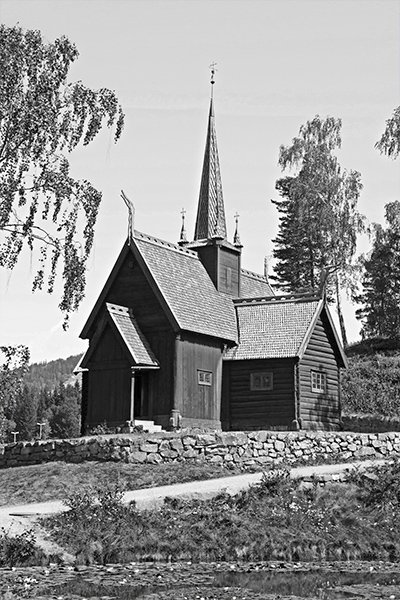
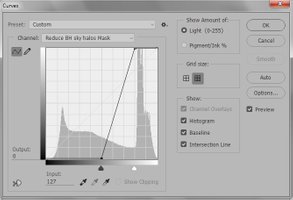

Figure 7. Mask, curve and updated mask
The finishing touch
Carefully examining the result so far, I’m still not content. As you can see on the mask, the halos and sky are white, most of the other parts are dark, but not the lighter parts of the image like the illuminated church roofs, the stone fence and the foreground path. This causes a slight but noticeable degradation of these areas. We need to exclude more.
How to do that? Well, the idea for that is simple, execution a bit harder. The main difference between the sky and other light image parts is their color: the sky is the only blue element. This is of course not always true, but for surprisingly many images it is an effective distinction. The question thus is, how can we exclude anything not blue?
Answer: by using blend-if sliders on the B channel of LAB. Problem: we are working in RGB, not in LAB. Simply converting is a bad idea: not all layers may survive such an action.
We can call Smart Objects to the rescue. A Smart Object enables the retoucher to pick one layer and work on that without touching the rest of the layer stack. Proceed as follows:
- Select the "Reduce BH sky halos" layer
- Right mouse: Convert to Smart Object
- Double click the layer icon. We now have a separate file containing our working layer only
- We don’t need the mask any more. Right click on it: Apply Layer Mask
See figure 8 for how the layer looks now. Now we can freely convert to LAB and exclude the non-blue pixels.
- Image: Mode: Lab color
- Layer: Layer Style: Blending Options
- Blend If: select “b” from the drop-down box
- In the slider called “This Layer”, move the rightmost controls left until just in the blue area
- Hold the Alt key and move the two halves of the control slightly apart
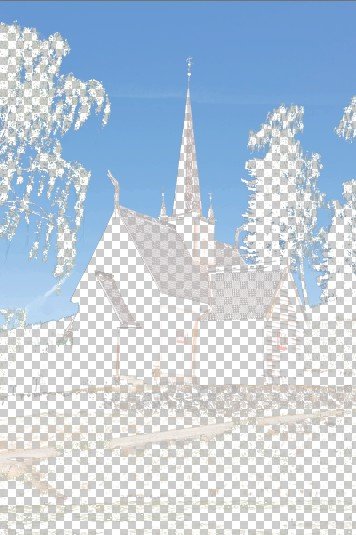


Figure 8. "Reduce BH sky halos" layer
Figure 9. Blend-if settings (above) and resulting layer (right)
See figure 9 for how this looks, and what the effect is on the layer at hand. The action sets the control points to 114,122 but other values may do as well. The effect is that anything not blue enough is excluded from the layer. Now we are ready to finish our action:
- Hit OK to accept the Layer Style
- Save and Close the Smart Object
- Right click on the "Reduce BH sky halos" layer and Rasterize Layer
- If needed, add a mask to this layer and paint out areas that are still not good
Finished! Look at figure 10 for a comparison of original, Bigger Hammer applied and final image.

Figure 10. Original, Bigger Hammer and final versions compared
I have created an action from the above. The action is meant to run right after the Bigger Hammer action. Interested? I made the action available on the "Downloadable Actions" page of my site. Feel free to download and use it.
NOTE. Since June 2018, the Reduce BH Sky Halos action is part of the PPW Panel (version 5). It comes in the "My Own Actions" subpanel. If you don't use the panel though, the download from my site is still available.
Soon I will publish a second article about this action, containing more examples and an overview of advantages and drawbacks. Stay tuned!
Gerald Bakker, 11 June 2016
Picture Postcard Workflow