Picture Postcard Workflow: Evaluating the Reduce BH Sky Halos action
A recap
Not long ago, I introduced a new action that may be helpful in eliminating halos caused by the PPW’s Bigger Hammer.
First, a recap. The Bigger Hammer’s main purpose is to enhance shadow and highlight detail. As such, it can be very effective, but it has one serious drawback: it can introduce ugly halos. Such halos occur where light and dark image areas meet and where detail is missing to camouflage it. This can happen anywhere, but the large majority of the cases is a light halo where a bright blue sky touches on something darker. (Second may be where bright blue sky touches on something very light – in that case a dark halo occurs in the sky.)
Anyway, using the knowledge that a sky is blue and free of texture, I wrote an action that – to a large extent – eliminates sky halos. See my previous PPW article for an explanation.
Now it’s time to look a bit further at this action. Does it have drawbacks and if so, can we take measures to counter them?
Beware of the blues
Let’s have a look at figure 1.
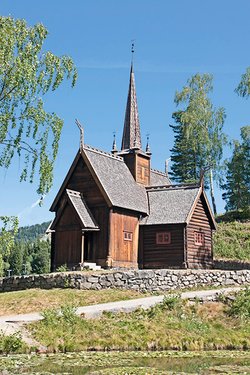
Stave Church, Norway
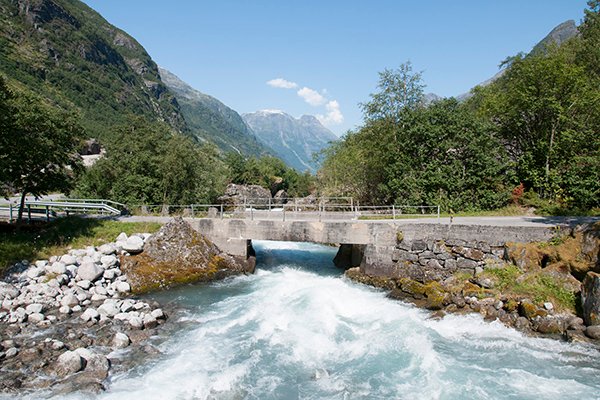
Figure 1. Original image

Figure 2. Bigger Hammer applied
This is a typical situation where the Bigger Hammer does a lot of good – not to the sky but to the foreground water. Figure 2 shows what it does: see how it brings the foam of the torrent to life. One would almost overlook the bad halos above the mountains. Yet, they ruin the image, at least for me. We need our new action! Run it, and see the result: figure 3.
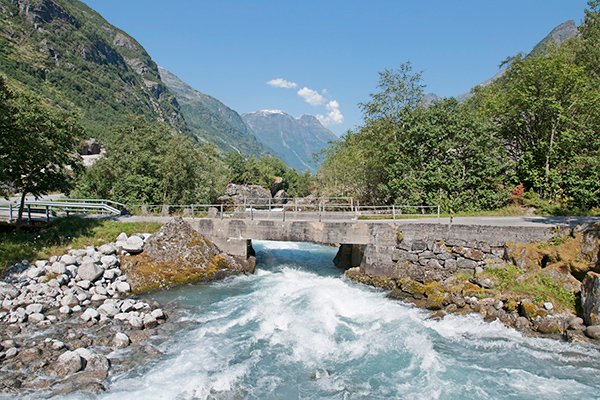
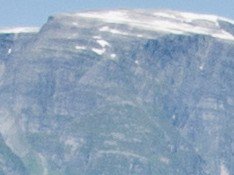

Figure 3. New action applied to figure 2
Figure 4. Fragment before and after applying the action
The halos are gone, but now we encounter a tricky side-effect that may far more likely be missed than the halos themselves. Remember that the action employs a layer called “Unblurred” which is the Bigger Hammer action without blur applied (hence, without halos). It tries to limit the exposure of this layer to the lighter blue areas, hoping that only the sky is coming through. Unfortunately, the action cannot distinguish a sky from other lighter blue things. Too much may be affected, causing an unwelcome loss of local contrast.
In our example, the distant mountains in the middle of the image are the victims of this effect. Look at figure 4 for a close-up: BH default and BH with reduced halos compared. You may think that this area is not blue (after all, it’s all rock and greenery) but the long distance through the atmosphere causes a blue tinge. Notice how texture is diminished.
The solution for the problem is not difficult. Use the mask that is provided with the “Reduce BH sky halos layer” and paint black over the problem area.
But wait…. wasn’t the whole idea of this action that we didn’t have to do any (manual) mask painting? Sure, and it’s a nuisance to have to do it anyway now. Just let me emphasize that painting over a halo requires more precision than masking out some blue areas. See what our mask (applied to the Reduce BH Sky Halos layer) could look like in figure 5. It’s really good enough to be that imprecise. For comparison, a proper mask that paints away the halos from the Unblurred layer directly would look like figure 6.
Figure 5. Mask for the new action

Figure 6. Mask for the Unblurred layer
The vanishing clouds
For a second example, see figure 7.
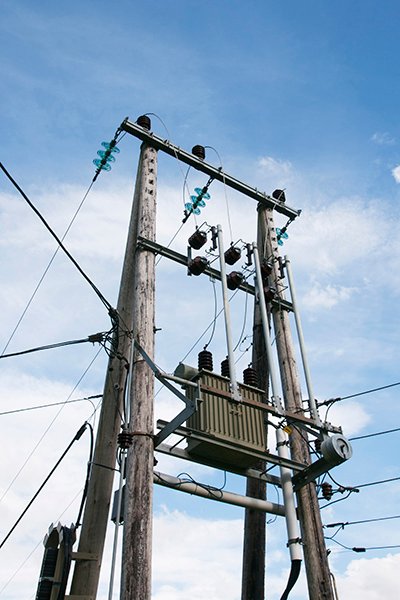
Figure 7. Original image
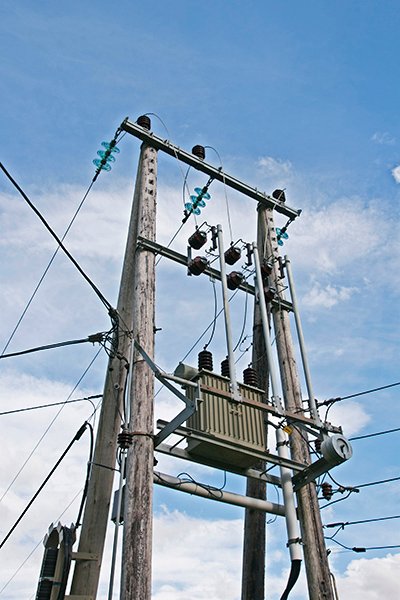
Figure 8. Bigger Hammer applied

Figure 9. Reduce Halos applied
A motivation to use the Bigger Hammer on this image could be to give the clouds more weight. See figure 8 what it provides. I like the effect, with the exception of (you guessed it) a bunch of halos, most notable along the darker parts of the poles and cables. So we run our action and inspect the result: figure 9. A definite improvement if you ask me, but I have to warn you for another side-effect.

Figure 10. Fragment of original, Bigger Hammer and BH Reduce Halos

Figure 11. Possible mask for the Reduce Halos layer
To show what happens, I picked a small image area on the right of the photo. See figure 10 for original, BH default and halos reduced. This fragment contains both an advantage and a disadvantage in one small area.
First, the advantage. Note the small cloud against the right of the frame. In the BH version, it is getting a dark halo around it. My action practically eliminates it. Its power is not limited to light halos only. That’s good news.
Now for the disadvantage. Look at the thinner clouds in the top of our fragment. The Bigger Hammer leaves them mostly untouched. The action seems to dissolve them.
How come?
Well, remember how the Overlay layer of the Bigger Hammer is constructed. Assuming we start with one layer only, Bigger Hammer puts a desaturated version on top of it and:
- changes it to Overlay mode (so light pixels get lighter and dark pixels darker);
- inverts it (so light pixels get darker and dark pixels lighter); and
- heavily blurs it (so light areas get darker and dark areas lighter)
The Unblurred layer, which is the basis for my action, is in fact the inverted Overlay without the blur. It is a layer that has light pixels darkened and vice versa. As clouds are lighter than sky, they are more darkened – hence the loss of texture in the airy clouds. The blur repairs this, because it smears any distinction between sky and clouds, provided they are small enough.
My Reduce Sky Halo action recovers the Unblurred layer for blue areas. Now when clouds are so thin as the ones we’re looking at, a lot of blue shines through. Hence, the action puts us back to the situation of before the blur. That's what we see in the third crop of figure 10.
It’s not hard to correct this: again, use the layer mask that comes with the action’s layer. Like in the previous example, a quick and dirty paint over the problem areas is good enough. See figure 11 for a mask that does the job - I created it in just a few seconds.
When the problems are elsewhere
Have a look at figure 12. I admit: this is not a typical image for the Bigger Hammer. Yet, there is a good reason to apply it; just be aware that this time we want to enhance shadows and not highlights. The main focus of this image is not any light area, it's the bottom of the ski-jump, and it’s overly dark in the original.
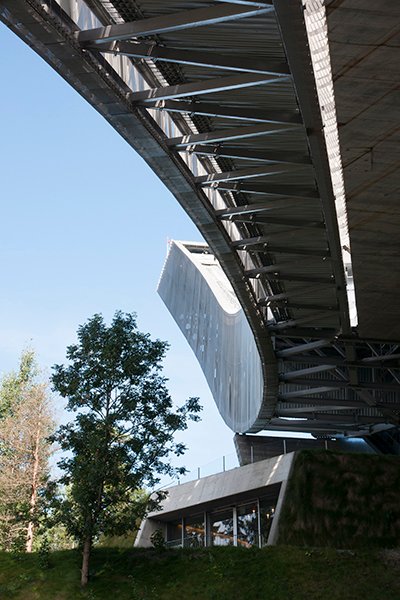
Figure 12. Original image

Figure 13. Bigger Hammer applied with different settings
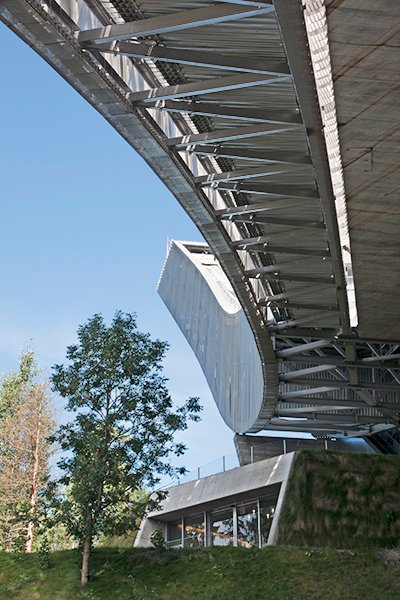
Figure 14. Reduce Halos applied
Proceed as follows.
- Run Bigger Hammer in default settings
- Change the Darkening Layer to Lightening Layer, and set its blend mode to Lighter Color. Keep opacity at 50% (as it is by default)
- Ignore the recommendation to set the blend mode of the Overlay layer to Soft Light; it doesn’t work well here
See figure 13 for the result. Certainly not bad, better in my opinion than what the other hammers deliver. There is a slight halo along the construction, not very obtrusive, but we have a fully automatic action to remove it, so why not run it. Figure 14 is what we get.
Now there are at least three important observations to be made.
- The halo is gone. That’s good news. My action works, no matter if we enhance light or dark areas. And I can tell you, it works as well if we pick different channels for the Overlay layer.
- Like in the previous examples, quite a bit of local contrast in the (blue tinted) reflecting metal stripes is lost. If that bothers you (as it does me), mask these areas out.
- Quite unexpectedly, the sky darkens by my action. This is an effect that needs investigation.
Why do we get a darker sky? Just to be sure, let me check the pixel values. LAB this time, to have unambiguous luminosity (L) values.
- I sample a pixel in the middle of the sky from the original image. Sample size 5x5 average, to prevent some random deviation from noise or whatever. The L value is 82.
- Next, Bigger Hammer default, including a Darkening Layer on 50%. L = 73, a good bit darker.
- Now, change Darkening to Lightening, opacity still 50%. The darkening effect is reduced. L = 78, about the middle between 73 and 82, as expected.
- Finally, apply the Reduce BH Sky Halos action. L is back at 73, the value that we had after applying the Bigger Hammer default.
Wait a minute... Let me check the original Unblurred layer. Confirmed: also here, our sky pixel measures L = 73, darker than what it should be. The problem is not in my new action, it’s in the Unblurred layer. It’s not correct for the case when the user changes Darkening to Lightening in the second layer. The Unblurred layer only works well under the (Bigger Hammer default) assumption that no Lightening layer exists. Otherwise – in cases where one wishes to enhance shadows instead of highlights – it undoes the lightening. See figure 15 for how a halo correction looks with the Unblurred layer for this case.
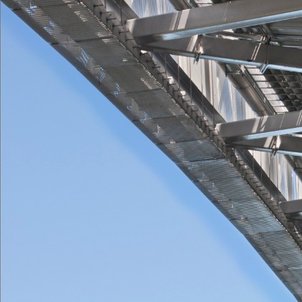
Figure 15. Halos "repaired" using the Unblurred layer
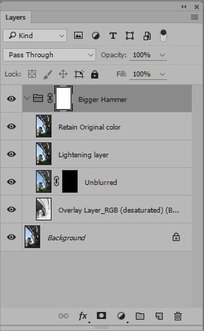
Figure 16. Suggested layer stack for Bigger Hammer
The problem is easily fixed, should you encounter it. Move the Unblurred layer (and the Reduce BH Sky Halos layer) down to just above the Overlay layer. Halo removal must be done before other fine-tuning like lightening/darkening or recovering color. See figure 16 for what I believe the correct layer order for Bigger Hammer should be.
Taming the beast
As you may know if you followed my website long enough, I am curious and love to experiment. No doubt, the PPW actions have a lot of potential. They work well in default mode, but I believe it’s worthwile finding out how to use them in other, more effective ways. The default is simply not always optimal for a given image. It pays to try different ways, analyze the results and use that for better corrections.
Bigger Hammer is like a wild beast: very powerful, but it takes effort to tame it. The more I do that, the more I use it, and the more I like it. It really shouldn’t remain locked up in a cage.
Gerald Bakker, 28 June 2016
Picture Postcard Workflow