Channels part 1: The basics
A vaguery and an anomaly
I started digital image editing, back in 2006, with a second-hand copy of Photoshop Elements version 3. Even that early version contained a lot of functionality, much of which I did not use back then and still don’t use. One Photoshop feature that I do employ a lot today but Elements back then did not support (and I think still doesn’t today) is channels.
For a long time, Photoshop’s channels remained a vague concept for me. What didn't help is that the English word "channel" can mean at least two things:
- a frequency band for radio or television broadcast; and
- a water passage
What these might have to do with image editing, I had no clue. (Thinking about it, I assume that a Photoshop channel relates to the first of these two meanings.)
Now, more than 10 years later, all that has changed. Channels and their operations have become second nature to me. So much that - much to my shame - I used the term multiple times in my previous Photoshop by the Numbers articles, without ever having explained it. See for example Unsharp Mask 1: The basics, and both Histograms pieces. If any of you have been deterred by that – my sincere apologies. Now is the time to correct this anomaly: to explain channels, and - more interesting - what a Photoshop user can do with them.
High Art
Color Channels…
Photoshop contains a Channels panel, so let's first have a look at that. Start Photoshop, go to Menu: Window - Channels. You should see an empty panel. No channel as long as no image file is open. Similar to layers, channels only exist as part of an image, that's our first observation.
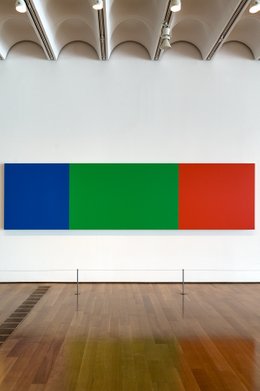
All right, so open an image file. Let's assume it is RGB coded. Look at figure 1 for an example.
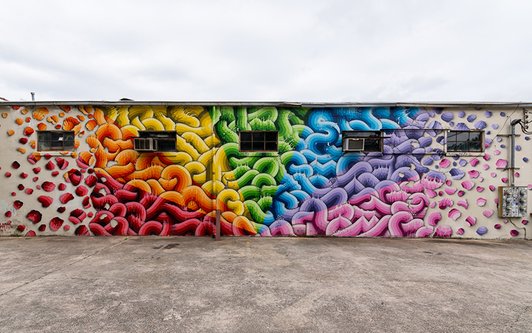
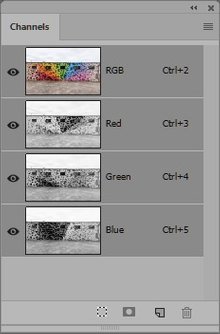
Figure 1. Example image and corresponding Channels panel
By default, Photoshop gives us 4 channels. They are called RGB, Red, Green and Blue. RGB is just the image file. For the other three, the explanation follows.
Remember that every pixel in an RGB-coded digital image consists of a red, a green and a blue value. Now imagine we only look at the red values. Discard the green and blue values. Do this for every pixel of the image. Obviously, we lose color information by this action, as color is the result of differing color component values. The result is monochrome, usually shown as a grayscale: this is, by definition, the red channel of the image. It's as simple as that.
Figure 2 is what it looks like. Anything bright red, pink and yellow in the original color image is light in this Red channel, because these colors have a high R component. Neutrals keep their luminosity. Green and blue areas are dark. Purple becomes a middle gray.
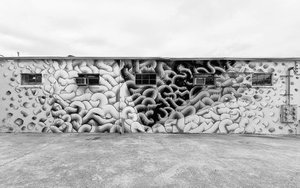
Figure 2. Red channel
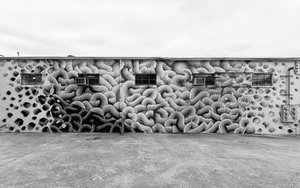
Figure 3. Green channel
Figure 4. Blue channel
The Green and Blue channels are constructed similarly. Figures 3 and 4 show them. Note that the red area is very dark in the Green channel, and the yellows and oranges are very dark in the Blue.
The Red, Green and Blue channels are called color channels. RGB is the composite channel.
… and their properties and peculiarities
Photoshop supports a different way to show the three color channels. With the image and the Channels panel still open, go to the menu and click Edit – Preferences – Interface… On the popup that you see, switch on the “Show Channels in Color” box, bottom left on that window. Immediately, you see the appearance of the three color channels change. See figure 5. So what happened?

Figure 5. Channels in color
Remember I said that a Red channel is what you get when you discard the other color components green and blue. In fact, that was not the complete truth. The grayscale Red channel representation is what you get when the green and blue are made equal to the red. The color appearance of figure 5 is what you get when the green and blue components are made black.
Here is a simple experiment that shows what goes on. Click the Red channel and memorize how it looks. Now click the Green channel and from the menu: Edit – Fill…, Contents: Black, Mode: Normal, Opacity: 100% and OK. The Green channel is now pitch black. Click the Blue channel and follow the same procedure. Now click the RGB channel to view the image itself, not one of the channels. See… this is the Red channel in its “Color” look.
As I think it’s better to have the channels displayed in grays, switch off the “Show Channels in Color” option and reload the image file.
It’s important to realize that the color channels are replaced automatically when you convert to a different color mode. Menu: Image – Mode – CMYK Color, ignore the warning and note the changed Channels palette. We’re now looking at CMYK channels, giving us one more for free. See figure 6 for how it looks. Convert to LAB and see the resulting channels (figure 7).

Figure 6. CMYK channels
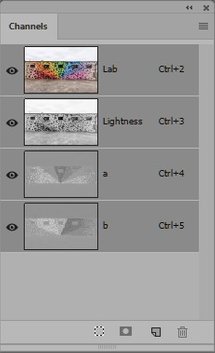
Figure 7. LAB channels
Something interesting happens when we convert to Grayscale. Try it, and click OK on the warning about discarding color information. Now we are left with only one channel! That’s what happens when color information is thrown away: only one channel is left. From now we may convert back to whatever color mode, but the file remains grayscale.
Alpha channels…
Now we know what color channels are, but they're not the only type. Bottom right in the channels panel is an icon that will create a brand new channel for your image. Do that, and guess what, we have a new channel! It's black by default, but we can change that. Paint on it, apply a gradient or a filter to it, etc. The only restriction seems to be that it’s grayscale: it cannot contain any color information. Such a free-format channel is called an alpha channel. See figure 8.
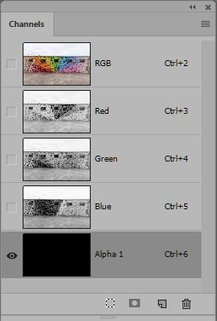
Figure 8. Just created an alpha channel
Well, the meaning of a color channel is quite clear, but what about alpha channels? I created one, and there it is, but what purpose does it serve? We'll come to that, but first... a bit more theory.
Alpha channels and color channels really behave differently. A color channel is tightly coupled to the image. In fact, a color image is composed of its channels. Change the image, and the color channels change with it. And idem the other way round. An alpha channel is a more independent item. It is linked to the image file, but not to the image itself. One can freely update an alpha channel without changing the look of the image.
Now for the applicability of alpha channels. To make that clear, here is a different way to create one. Return to your image file and make a selection, using any of the selection tools (lasso, rectangular, magic wand, etc.). Now go to the menu and Select: Save Selection… You see a popup where a name can be entered. Do that and voilà, the selection is stored as a new channel! This is, as far as I'm concerned, the one and only purpose of alpha channels: to store selections.

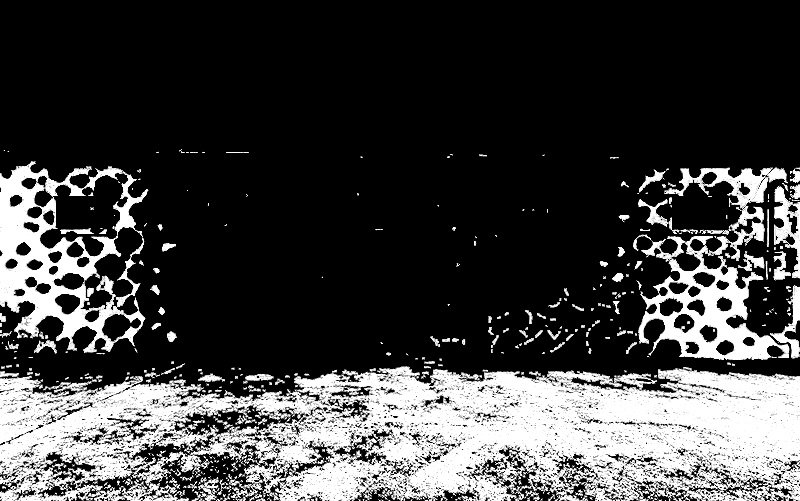
Figure 9. Two representations of a selection
Figure 9 shows two manifestions of a magic wand selection of the middle grays in our image. Left: the default representation called "marching ants". (Obviously, the marching effect is not visible in a static picture like this.) Right: the corresponding channel. Note how much better the channel exhibits a selection's boundaries than the marching ants do.
You may assume that an alpha channel like this is white inside the selection and black elsewhere, but this description is too restrictive. To see what I mean, delete the channel to start over again. Make a random selection, but this time, apply a heavy feather to it: Menu: Select – Modify – Feather… and enter a big radius, say 100 pixels. Now save the selection again as a new alpha channel. Click the channel to make it visible. Note, again, the channel is white inside the selection and black outside, but there is a wide transition of gray pixels. These are partially selected.
In general, a selection doesn’t have to divide an image into "inside" and "outside" with nothing in-between. Pixels may be half selected, 25% selected, 90% selected, etc. No pixel could be 100% white or black, and we’re still dealing with a valid selection. A selection is really just a grayscale in the exact same size as the image. The lighter the pixel, the more it is selected. This observation makes clear that there is an exact match between selections and alpha channels. I already described how to make a channel from a selection. To go the other way round, Ctrl-click the alpha channel: this recreates the selection from the corresponding channel.
… and their properties and peculiarities
A number of interesting things can be said about channels. Let me list some of them.
1. On your image, create an adjustment layer. Note that Photoshop automatically creates a layer mask for it. (Alternatively, pick any layer and if it doesn’t have a mask yet, add it manually.) Now look at the Channels panel: a channel called “<layer name> Mask” has been automatically created. See figure 10. But it’s there only while your layer is active. If you want to store its contents for later usage, make a copy and give that a meaningful name.
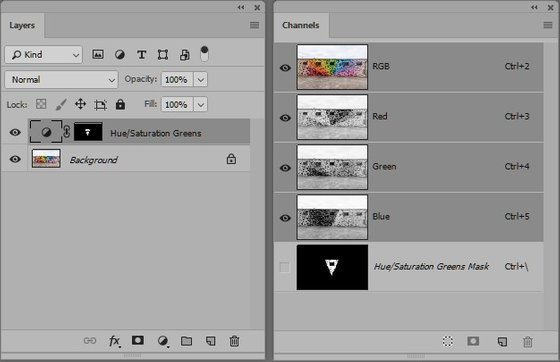
Figure 10. A layer mask and its corresponding channel
2. Channels can be saved together with an image file, allowing you to continue working with them any next time, without having to keep Photoshop open. But the file format must be PSD or TIF; save as JPG and the channels are lost. A selection is never part of a stored image file.
3. We can say that channels, layer masks and selections are really three manifestations of the same thing. We have seen how to go from a selection to a channel and vice versa. To convert between masks and channels, there is an infinitely useful Photoshop command called “Apply Image”. This will be the subject of a future article.
4. An alpha channel can be deleted – no surprise there. But color channels can be deleted too, and strange things happen when you do that.
For example, delete the Red channel from an RGB image, Photoshop will leave you with just two color channels: a Magenta and a Yellow. See figure 11 below.
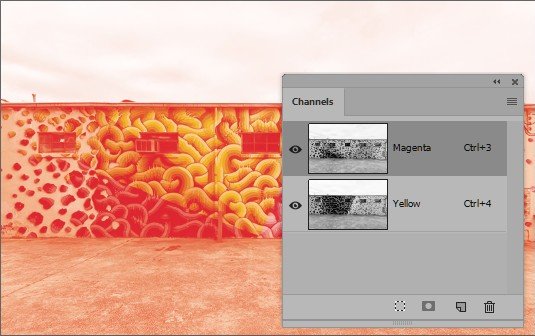
Figure 11. Just removed the Red channel from an RGB-coded file
It's hard to see the logic here. Apparently, Photoshop converts to CMYK and then removes the first color component which happens to the Cyan. But there is no Black either. I'd say, when I remove the Red channel, I expect a blue-green image as a result, but instead I get something orange-red.
In CMYK, deleting a color channel is far more intuitive. Remove the Cyan, and only Magenta, Yellow and Black remain.
In LAB, remove any color channel and the names of the remaining channels are “Alpha 1” and “Alpha 2”. Activate both and some pinkish representation of the image follows. What we are looking at, I really don’t know. I certainly would advise against doing so in any case.
5. Talking about other color modes… What if we want a channel from a color mode that is not the current mode we’re working in? Let’s say, we want a copy of the Black channel, to be used as alpha channel in an RGB image file.
The only way to accomplish this is to make a duplicate of the current image, convert that to CMYK (or any other color mode), go to the Channels panel, activate the desired channel, right-mouse, Duplicate Channel… and enter an appropriate name and choose the original file on the Document drop-down. See figure 12 for the result.
Figure 12. An alpha channel that is a copy of CMYK's Black channel
6. There is a lot to say about user interface aspects. Given a flattened document (Background only), when a user clicks on any color channel, this channel is shown right away. Great!
Now add an adjustment layer and again, click any of the color channels. This time, nothing happens. Why not? I have no clue. For a long time, I thought that Photoshop prohibites viewing color channels from an adjustment layer. But there is a workaround: first, click the composite (RGB) channel. Now the behavior is back to normal.
7. Don't try to use the Delete button to remove a channel! It will remove the current layer instead (provided that it was not locked). At least, that's what happens on my system. Presumably this is highly dependent on operating system (MAC/Windows), Photoshop version and keyboard shortcut configuration. Just be warned though.
Channels by the Numbers
Here are some numbers related to channels:
- There is a maximum of 56 channels per image. Why they chose that number I don’t know, but whatever. For all reasonable edit work, it's plenty. Maybe beauty retouchers need more, but I’m sure they found a workaround for this limitation.
- Every channel is an 8-bit grayscale, even if the underlying image is 16-bit coded. The exception, as it seems, is the composite channel. But I feel that composite channels (RGB, CMYK etc.) are not real channels. They are there to enable a user to view and manipulate the full color image - in other words, just to serve the user interface.
That’s it. But some very interesting operations exist on channels – Calculations, Channel Mixer and Apply Image – these will be the subjects of subsequent articles!
Gerald Bakker, 5 July 2018
Thanks to Bill Iverson for his valuable comments.
Related articles

Photoshop by the Numbers
