The Unsharp Mask filter part 1: The basics
Filters by the numbers
Open Photoshop’s Filter menu and browse through all items. The ones that end with “…” trigger a popup where the user is supposed to enter more information. In most of these cases, one or more numbers must be chosen. Just a few examples:
- Box Blur: Radius
- Displace: Horizontal Scale and Vertical Scale
- Color Halftone: Max Radius, Channel 1, Channel 2, Channel 3 and Channel 4
- Unsharp Mask: Amount, Radius and Threshold
- High Pass: Radius
In a series of articles called “Photoshop by the Numbers” it is only to be expected that much material is dedicated to such filters, right? All these numbers cry for extensive explanations, don’t they?
Turns out, the current article is the first one that closely examines a filter. So far, I have mostly written about properties of digital images themselves – color coding, resolution, profiles and bit depth. Neither filters nor adjustments (Contrast, Levels, Curves, etc.) have been discussed. So it’s time for the first one: the Unsharp Mask (USM) filter.
It is my intention to do a series of articles about sharpening, from an explanation of USM, a tutorial explaining how to make halo maps, to a close look at the Sharpen action of the PPW panel. This article is the kick-off.
Mirror-selfie
The simple experiment
I assume you know that the Unsharp Mask filter is supposed to make your image “sharper”. Well, let me start to say that this is a slight misconception. USM cannot turn a blurry image into a sharp image, not in the way that better focusing does. We’ll see what goes on in the following example.

Figure 1. Example image
Figure 2. The same image, zoomed in at 500%
Figure 1 is the simplest example image that we can create. It is colorless, and it contains only one line that could possibly be sharpened. The left half of the image is a light gray – RGB = 175,175,175. The right half is a dark gray: RGB = 75,75,75. The separation between both halves is as sharp as possible.
Figure 2 shows a detail, zoomed in at 500%. See any difference? No, you don't. The line is so sharp that no matter how far we zoom in, it will never lose its acuity. The question is: can Photoshop make it even sharper?
Let’s find out. In Photoshop: Menu – Filter – Sharpen – Unsharp Mask and enter the following values (the factory defaults if I remember well):
- Amount: 100%
- Radius: 1.0 pixels
- Threshold: 0 Levels
Hit OK.

Figure 3. The image after sharpening

Figure 4. The same image, zoomed in at 500%
See figure 3 for how the result looks, and figure 4 for the same image zoomed in at 500%. Looking at the 100% representation, I would say: yes, the line looks sharper now. Figure 4 gives the trick away. On the left side of the edge, the light gray has turned even lighter. The other side has gotten a dark line. The extra light and dark touch each other, giving – when shown at 100% - a sensation of super sharpness. That’s all. The edge was already sharp, but the perception of sharpness was strengthened by making the lighter side even lighter, and the darker side even darker. Zoomed in at 500% by the way, it looks just artificial.
Light and dark lines along adjoining image areas are often called halos.
A quick inspection of the numbers. The original edge was luminance value 175 on the left and 75 on the right. After the sharpen action, the two sides touch each other at 206 and 44 respectively. Instead of a difference of 100 luminance values, it has become 162. That’s the illusion of the increased sharpness.
To understand even better what goes on, let’s have a look at what each of the three parameters means.
The three parameters
So, we have these three numbers, Amount, Radius and Threshold. What do they mean?
- Amount is the strength at which the sharpen is being applied. The higher the amount, the more the filter tries to drive adjoining different pixels apart.
- Radius is the number of pixels over which the sharpen action is applied. A higher radius doesn’t make the sharpen action stronger, but it impacts pixels further away from an edge.
- Threshold is a protection against sharpening low-contrast edges. The higher the threshold, the stronger an edge needs to be before it is affected by the filter.
Better look at some examples.

Figure 5. Sharpened with 500% Amount

Figure 6. The same image, zoomed in at 500%
First, what happens when we increase Amount from 100% to 500%? See figures 5 and 6 for how these look. The two sides now touch with full white and full black. No more distinction is possible. Note that it looks like the halos have become wider, but I believe that’s an illusion. In the 100% version, pixel values change at a distance of three (!) pixels from the edge, even at the Radius setting of 1.0. In the Amount 500% version, that’s not different. It looks different because the effect is so much stronger.

Figure 7. Sharpened with 5.0 Radius

Figure 8. The same image, zoomed in at 500%
Next, we change Radius to 5.0 and reset Amount to 100%. Figures 7 and 8 show the effect. Not much explanation needed I think. Interestingly, this looks more natural zoomed in at 500% than the 1-pixel versions (figures 4 and 6). One could cut a finger with the edge now! In figure 7 though, the sharpened edge is too obvious to be convincing.
Threshold is somewhat less intuitive. I would expect this parameter to only have effect on low-contrast edges, but it weakens the sharpening on high-contrast edges as well. Repeat the previous experiments, leave Amount and Radius at their default values but set Threshold to 10.
I don't show you the result because it looks very similar to figures 3 and 4. When looking carefully, it seems like the sharpen has just weakened slightly. Well, it has, as the numbers prove:
- Unsharpened: 175 left of edge vs. 75 right of edge
- Sharpened w/threshold 0: 206 left vs. 44 right
- Sharpened w/threshold 10: 196 left vs. 54 right
As you see, at each side the effect of the sharpening has lowered by 10 points (in Threshold language: 10 levels). The left side has lightened 10 points less, the right side darkened 10 points less.
The most important benefit of this moderation is that weak edges – where the USM filter would move pixels less than 10 levels – are not affected at all. This helps to prevent noise from being accentuated by the filter.
Let the colors come in
So far, we only looked at two grays. The simplest possible case, as grays only distinguish in lighter or darker. What if two different colors touch each other and we apply the USM filter?
Time for our second experiment. Create a new file, split it in half like for the first experiment. Fill the left half with color RGB 200,100,50 which is a brownish orange. Make the right half RGB 150,125,150 which is a lilac. Apply a good dose of USM, e.g. Amount 200%, Radius 2.0 and Threshold 0. See figure 9 for the sharpened version, zoomed in at 500%. See what happens?

Figure 9. A two-color file, sharpened
These two colors do not differ much in lightness. But the USM causes the colors to shift. On the left, a reddish stripe is inserted by the filter. On the right, an even worse light blue turns up. There is no perception of sharpening at all in my opinion, it looks more like a failed decoration.
What happened?


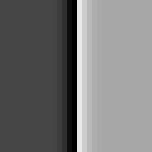
Figure 10. Fragments of red, green and blue components of figure 9.
The Unsharp Mask filter sharpens per channel (color component). It sharpens the Red, Green and Blue components separately. Figure 10 shows the three channels in their sharpened versions. And below is the numeric analysis.
- The original edge is (200,100,50) against (150,125,150).
- The Red is lighter on the left, so USM adds a good bit of it to the orange and removes it from the lilac.
- The Green is slightly darker on the left, so some green is removed from the orange and some is added to the lilac.
- The Blue is much darker on the left, so it’s practically removed from the orange and close to its maximum on the right.
On the left side of the edge, the RGB values have become 238,80,0 which is way more red than the original. On the right side, the resulting color measures 112,145,228 which is not lilac at all, more a color of a deep blue sky.
Such color shifts are universally considered an unwanted side-effect of sharpening. The simplest remedy against this is to do the sharpening on a separate layer and change layer mode to Luminosity.
In the next article, I will pick some real photographs and see what the three sharpening parameters do to them. The theory may be straightforward, the practice of sharpening is tricky to say the least.
Gerald Bakker, 18 Nov. 2017
Related articles

Photoshop by the Numbers
