Color variation in Lightroom
Purpose
Those who are familiar with the Picture Postcard Workflow, and those who follow my website, will know that an action called Modern Man from Mars (MMM) is one of the key steps of this workflow. Dan Margulis calls it the “signature move” of the PPW. I myself am very fond of it.
For those not familiar with it, let me shortly explain what it does. The user is supposed to provide a rough selection containing what is considered an important part of the image, in terms of color and luminosity values. The action then tries to bring more variation into areas that are similar to what was in the selection. The main goal has always been more color variation (not so much more color) but some extra contrast may also be provided.
If you want a better understanding of this, read my first MMM article. It explains in detail how the action works, what its advantages and disadvantages are, and it introduces an alternative called “MMM Finetuned” which is now part of the PPW panel.
For now, I think it’s enough to look at below example, before and after applying MMM, using a selection of greens.
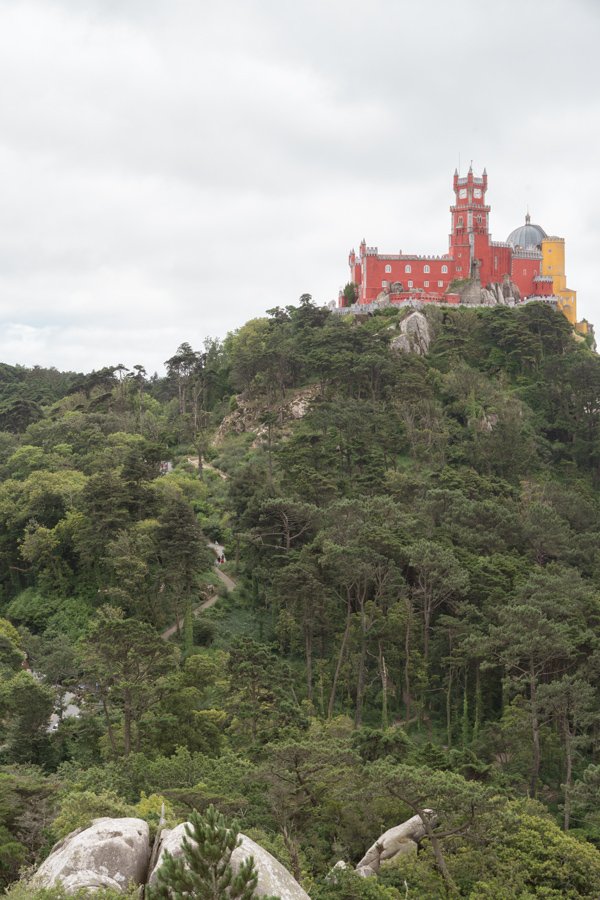
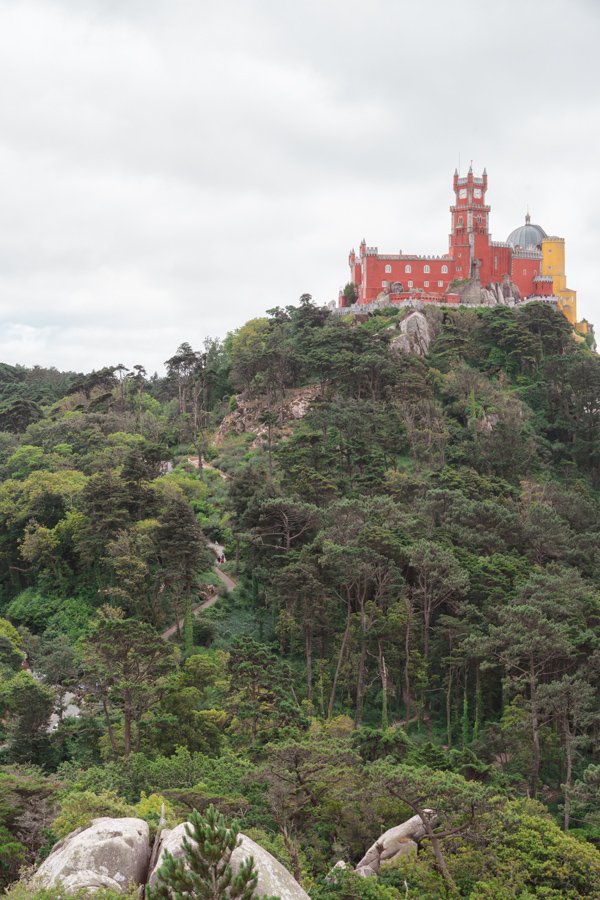
Figure 1. Image before and after applying MMM, starting from a selection of greens

Cityscape
The difference may look subtle, but increasing saturation from the enhanced (right) version looks considerably better than from the original (left).
The purpose of this article is to show an alternative way of inducing color variation, using Lightroom or Camera Raw only. The result is supposed to be similar to what MMM can accomplish. This may be helpful for:
- those who don’t own a copy of Photoshop but use Lightroom exclusively for their image processing
- those who do most of their processing in Lightroom anyway and are reluctant to bring their images into Photoshop when it’s not absolutely necessary
- those who own Photoshop Elements only (MMM works in the LAB color mode which is not supported by Elements)
Also, I believe this procedure is more intiutive as the user is supposed to perform some manual actions. It may help to better understand what the more complex MMM action does.
Preparation
Before we start our tutorial, we need to do a quick analysis of the image and what we want to accomplish. Color variation, right? Look at your image and ask yourself: which are the predominant colors of the interesting part of the image, the part for which you search more variation? Try to map the answer to the list of colors as found in Lightroom’s and Camera Raw's HSL and Color panels:
Red, Orange, Yellow, Green, Aqua, Blue, Purple, Magenta.
Pick two colors, and make sure they are adjacent in this list.

Figure 2.

Figure 3.

Figure 4.
Look at above three examples. In figure 2, the important colors are yellow and orange. In figure 3, aqua and blue. In figure 4, green and yellow.
Green and yellow? That may be not immediately evident. Isn’t it just green? Well, yes and no. For the eye, all we see is green (except the light-brown dry grass, but we are not searching color variation there). But in reality, nature greens tend much more towards yellow than towards blue.
(Here is a short recap: green is between yellow and blue. In terms of RGB values, “green” has higher G than both R and B. If the R is second, it’s a warm, yellowish green. If the B is second, it’s a cooler, more bluish green. When R and G are equal, and higher than B, the story is a little twisted. In theory, this is a yellow tint. But for darker values, we perceive this as green.
As an example, in the image of figure 4, one typical green measures (Lightroom values in percentages):
R 30.5
G 32.0
B 15.9
With R and G that close, the software may well consider this a yellow.)
The procedure works best if you start with two colors, but if you can only name one, don’t give up yet: I will explain later how to proceed in that case.
Procedure
So we’re ready to go now. Let me start with the third example above (figure 4). We now know that its critical colors are green and yellow. The basic idea is to separate the yellowish greens as much as possible from the more bluish greens. The interface in Lightroom is slightly different from Camera Raw, so I have to make a distinction in some of the steps.
- In Lightroom: Open the HSL / Color frame in the Develop module. Both HSL and Color can do the job – but I find Color works more intuitively, so activate that. See figure 5.
In Camera Raw: Open the HSL Adjustments tab. See figure 6.

Figure 5. Adjustment panel in Lightroom

Figure 6. Idem in Camera Raw
- In Lightroom: On the Yellow block, move the Hue slider away from Green (the other color), meaning: leftwards towards orange/red. The actual amount is not critical yet, but don’t be shy nor make the image look ridiculous.
In Camera Raw: On the Hue tab, move the Yellow slider leftwards, similarly as for Lightroom. - Move Yellow/Saturation to the right for optimal effect. (In Camera Raw, this requires switching to the Saturation tab.) Again, prevent an unnatural look.
- Move Yellow/Luminance to taste. It may be left or right, whatever looks best for now.
See figure 7 for a comparison of the original and the result so far. You may think the image looks too yellow now but that's okay. I think you can predict how to continue.


Figure 7. Original and intermediate result after having manipulated the Yellows only.
- In Lightroom: On the Green block of the Color frame, move Hue to the right, towards cyan (here called Aqua). Again, the move is away from the other chosen color (yellow).
In Camera Raw: On the Hue block, move the Green tab to the right. - Again, move Green/Saturation to the right. Usually, it’s best to pick a different value than for the first color, but this is no hard rule. Experimentation and taste are what matters most.
- Green/Luminance: no fixed rule. Move the slider left and right and choose what looks best.
This is basically it. However, you may have the feeling that it’s is not yet what you want. The colors may have gotten too much towards one side (say, too bluish greens). So go back to the first color and move each of the sliders until you are happy with the result. Some fine-tuning is always recommendable. Even if you think you’ve done a good job, something better may be achievable.
Remember: the final goal is getting lively colors while retaining a natural look. Don’t go overboard. In the case of my example image, I arrived at the following values:
Yellow -50 / +40 / +20
Green +30 / +20 / +10

Figure 8. Final result of our new procedure

Figure 9. Result of applying the MMM action
See figure 8 for the final result. For comparison, figure 9 is the result of a default application of the MMM action, starting with a selection of the full image. They are not that different, are they?
Now what if you really can mention only one color in your important image area? Well, don’t despair! Start the procedure with this color, and try both of the following:
- Move the Hue slider left and the Saturation and Luminance sliders as described above. Then pick the color below the current one, and move the Hue slider right.
- Reset, and now move the Hue slider right and the Saturation slider left. Then pick the color above it, and move the Hue slider left.
I bet that one of these gave the best result. So proceed with that, doing the fine-tuning as described earlier.
A few finalizing remarks
1. Limitations
I have to be honest: there are some limitations, cases where the procedure won’t work. I think they are obvious, but let me list them anyway:
- when you search to enhance variation in an image area that originally contains no variation at all (say, a clear blue sky – what do you expect?)
- when you search variation in a neutral (grey) image area (we’re working with color after all)
- when the important image area already contains a large variety of different hues (so what’s there to enhance?)
Needless to say, in all of these cases MMM won’t do much good either.
2. Multiple color combinations
It is certainly possible to run the full procedure multiple times for one image (similar to what the MMM Finetuned action can do). Imagine a forest scene with a creek. It consists of natural greens plus bluish tints. Why not enhance both? Work with green and yellow for the greenery, and with blue and aqua for the water. Such cases are quite rare though.
Another possibility is to manipulate three adjacent colors. Sometimes that works. The photograph on the top of this article is an example of this. See figure 10 below for the original image, and the result after the complex color shifting in Lightroom as shown in figure 11.
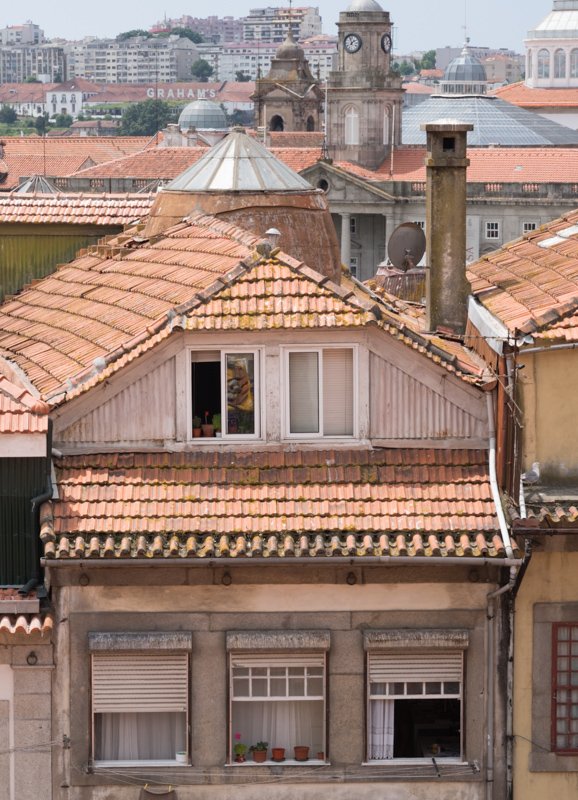


Figure 10. Before (left) and after the manipulation as shown in figure 11.
Figure 11. Lightroom screenshot.
3. A comparison with the MMM action
Let me finish listing some crucial differences between this procedure and the original MMM action. I want to emphasize here that I don’t think my procedure is better or even equivalent to the MMM action, but it has some advantages (and disadvantages) that may be important for some.
- I already noted that MMM needs full Photoshop (it doesn’t work in Elements). The above procedure is supported by Lightroom and Camera Raw. It even works in Photoshop Elements (v.12 or higher) through the Open in Camera Raw option. And who knows, other image editing software or raw processors may support the above, provided they have something similar to the HSL or Color frames of Lightroom and Camera Raw.
- MMM is an action, the only manual part is the selection that it runs from. My procedure requires more work.
- MMM runs on any selection. My procedure needs a limited color range. (To be honest, I believe that MMM is most beneficial for image areas with limited color range, but exceptions will certainly exist.)
- As MMM gives the user a few Photoshop layers, there are plenty of possibilities for fine-tuning: changing opacities and invoking blend-if sliders to name a few. But some of these require advanced Photoshop knowledge. I believe my procedure is more intuitive and easier to learn.
- MMM may unintentionally shift different colors than what the initial selection contained. (The alternative MMM Finetuned action does not have that disadvantage.) My procedure does not have that risk.
Obviously, I cannot provide an automatic action. All of this is manual work. Besides, it’s supposed to be done in Lightroom or Camera Raw, for which no actions are possible anyway.
Gerald Bakker, 26 August 2018
Tutorials and Actions