How to replace a white, blown-out sky
Of frustrations, technologies and challenges
It is a common frustration of every outdoor photographer. Having travelled a long way to visit an iconic place, to be confronted with the most boring of all skies: plain white. Clouds are fine, as long as they have a lively, dramatic look. The flat look of an overcast sky is, well, not what most photographers are after. Unfortunately, we don’t always have a choice.
In the latest Photoshop major release (22 or 2021), Adobe introduced a new tool called Sky replacement. The tool is “powered by artifical intelligence” – whatever that’s supposed to mean – but I must say, it is quite impressive. Its properties window contains a number of controls to balance foreground and new sky – color, lighting etc. – plus, you can choose from a number of prefab skies or pick your own favorite. Later in this article I will have a look at how this new tool performs. No matter how convenient it is, we will see that all this powerful AI-technology has a few drawbacks as well.
Existing Photoshop techniques that replace a bad sky by something better (from before the introduction of this new tool) are as widespread as the bad skies themselves. Many tutorials can be found on the internet. In some of these, the replacement is something artificial like a plain blue color, usually with a gradient applied to it. In others, the replacement is a suitable sky image, taken at a different place, different time and in different weather conditions. Of course, the combination of existing foreground and new sky must be kept believable. A very colorful twilight sky put above a dull landscape scene looks obviously photoshopped, something that the serious retoucher should avoid. Either the new sky must be toned down in such cases, or the foreground must be adapted accordingly.

Lago di Garda, Italy
In all tutorials, the main challenge appears to be to separate sky from everything else. We strive to replace the sky only and leave the foreground alone. A very precise selection or mask must be created, or we end up with either ugly halos or blues bleeding into edges like roof tops or tree branches. As soon as I started experimenting myself with some example images, this turned out to be a major stumbling block. Some non-sky detail – a distant antenna, thin twigs – may be so bleak that it may easily disappear behind the new sky. And sometimes the foreground is so complex – think an overhanging tree – that it seems impossible to create a good mask for it.
This article consists of two parts. One, I show the procedure I often follow to replace a blown-out sky, in the form of a tutorial. Two, I compare the result with what the new tool delivers.
A complex example – how to start
My tutorial tries to cover exactly the difficulties I outlined in the previous paragraph: to retain fine edge detail while avoiding haloing. Be aware that the technique only works when the sky is (close to) white. You may wish to replace a boring, monotonous blue sky in some cases, but this requires a different approach.

Figure 1. Original image
Figure 1 is an example image that I will use as test case. It’s an original image taken in JPG. The sky is not completely white, but it doesn’t show much detail or color either. Note that there is shadow on the foreground pavement, so we can replace the sky with something more blue without making the whole look inconsistent. The question is… how to retain all the annoying masts and the pine needles of the two trees? Figure 2 shows two of the harder areas, but in fact the whole upper half of the image is problematic. As you see, I didn’t pick a straightforward example!


Figure 2. Fragments of fig.1 that show how tricky a sky mask will be
So first, we have to select the whites of the sky. I find the Magic Wand the easiest tool for the job. Yet, we have to be careful. We are about to select whites, but there are more whites in the image than just the sky: just look at all the boats in the marina.
To prevent any non-sky element of the image accidentally included in the selection, I often start by making a quick “pre-selection” that easily excludes a lot of foreground that doesn’t belong to the sky anyway. In the case of our example image, I drew a rectangular selection containing everything from the bluish-gray line (the opposite side of the bay) and above. See figure 3.


Figure 3. Selection to limit working area (left) and resulting layer (right)
Click ctrl-J when this pre-selection is good enough, and rename the new layer to “Pre-selection” or anything meaningful. Hide the background layer. See figure 3 (right) for what we now have. The real work still needs to be done, but it’s a lot easier from this starting point.
The real work
Now, back to the Magic Wand tool. I prefer the following attributes:
- Choose “Add to selection” (second "small squares" icon from the left, top left on the toolbar)
- Sample Size “3 by 3 Average”
- Tolerance 10
- Anti-alias switched on, Contiguous switched off
Figure 4. Magic Wand settings as suggested in the text
Sample Size could be higher if the image is noisy. Tolerance could be higher if the distinction between sky and other elements is clear enough.
Make sure the new layer is active, and carefully start clicking on sky areas. About 4-6 times clicking should be enough. Don’t go too far: the more you click, the higher the risk that too much gets included.
When you think the selection is good, zoom in to 100% and carefully examine the full layer. In this image, the masts should be excluded, but thinner elements like the strings and the pine needles do not matter that much. See figure 5 for an example area and the corresponding mask. Note that most of the lighter ropes did not make the mask, but don't worry: I will address that later on.


Figure 5. Example image area and corresponding mask
You may find that the selection is not perfect yet. Either invoke the Magic Wand some more to get all sky included, or manually exclude image parts that do not belong to the sky. When done, save the selection: Menu: Select – Save Selection… and call the resulting channel “Sky-rough”.
The rest of the process is straightforward, provided you have a suitable replacement sky at hand. Go through the following steps:
- Expand the selection by a small amount, something like 1-3 pixels. Our example image is a 12MP file, for which just 1 pixel seems to be enough. Bigger files may require 2 or maybe 3 pixels. Menu: Select – Modify – Expand..., and enter the amount.
- Feather the selection by the amount of the previous step 1. In our case, that’s a feather of 1 pixel. Menu: Select – Modify – Feather..., and enter the amount.
- Again, save the selection and call the resulting channel “Sky-smooth”.
- Delete the layer “Pre-selection”. It is no longer necessary.
The replacement sky
Now it’s time to collate the replacement sky. Open a suitable file (having at least the same amount of pixels and the same orientation as the original file) with a sky that looks good and fits the current scene. I took one from the resources of Dan Margulis’ Modern Photoshop Color Workflow book, chapter 8; the file is called Ch08_clouds_4_Fig_8-11B.jpg. Open the chosen file in Photoshop, select all of it and copy/paste over the bad-sky image. Call the resulting new layer “Sky”. See figure 6 for the first result.

Figure 6. Original image with new sky pasted on top
Proceed with the tutorial:
- Open the channels window (if it was not already open) and Ctrl-click on the Sky-smooth channel. The associated selection is now reloaded.
- With the Sky layer active, add a layer mask.
- Change the layer blend mode to Multiply. This is a crucial step. Whatever small detail was lost in the selection is now recovered.
- Usually, this looks overdone and artificial. Lower the layer opacity to a value that recovers believability of the new sky. In our case, I chose for 50%.
Figure 7 shows the result so far, compared with the original.
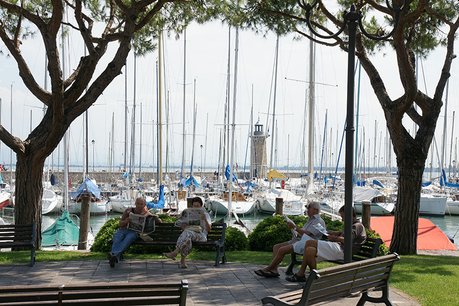

Figure 7. Original (left) compared to intermediate result (right)
This finishes the main part of the tutorial. The final steps below are optional. Usually, the closer to the horizon, the lighter the sky is. If the sky in your image comes close to the horizon, you may get an even better result by adding a gradient as follows:
- Above the new Sky layer, add a Solid Color adjustment layer and enter color white (R, G and B each 255). Call the new layer “Sky gradient”.
- Right-click on the new layer and Create Clipping Mask.
- Left-click on the mask of the new layer to give it focus. Pick the Gradient tool and set colors to defaults (foreground white, background black).
- Now draw a gradient from about halfway the lower half of the image to about halfway the upper half.
See figure 8 for the gradient move (left) and the final result (right). Note the lightened sky above the horizon.


Figure 8. Following the instructions in the text, add a gradient (left) and the result (right)


Figure 9. Two fragments of the final version (figure 8 right)
See figure 9 for two details zoomed in (roughly the same fragments as shown in figure 2). Note how well new sky and small detail have been blended.
Some disclaimers
First, as I emphasized before, this method really only works when the sky is white or very close to white. I find getting a believable result after replacing a blue sky much harder to accomplish. I tried various tutorials on the web, but found none satisfactory in complex cases like the above. Either small detail is lost, or light halos remain.
Second, when non-sky areas are close to white as well, and they cannot be easily masked out (like we did in the preparation step), there may be a problem. This is similar to photographing a blond model against a very light background, and then trying to replace the background. How to separate every single flyaway hair from the background? Don’t expect a simple answer to that question.
Third, when the distinction between sky and land is very weak, the Magic Wand tool may not be suitable to construct a proper sky mask. Either some of the sky is not included, or some of the land is. In such cases, consider including the vaguest parts of the foreground, as a different sky should make distant areas look different (bluer, less faint) as well. I used this technique in the example image on the top of this page. We will see that the new Sky Replacement tool works similarly.
What about the new tool?
Isn’t it interesting, now that we’ve seen what can be accomplished by a reasonably simple manual way of sky replacement, to find out what this “AI-powered” automatic tool can do?
Of course. So let’s have a look. Open the same image as before and with just the background layer open, go to the menu: Edit – Sky Replacement… The properties window of figure 10 is shown.

Figure 10. Sky Replacement properties window
To load the same sky that we used in the manual method, click the drop-down next to the sky preview. Next, click the ‘+’ sign and navigate to the desired image file. Photoshop asks for a name, so enter whatever you like and it’s there. Right! Next, on the bottom of the window, choose Output To: New Layers. Accept all other defaults and click OK.
The tool creates a Sky Replacement Group containing a few layers that each perform part of the job. The most important one is called Sky – it contains the new sky accompanied by the sky mask that the tool has constructed. Now let’s put the automatic result next to the manual result. See figure 11. (To make the two versions comparable, I changed opacity of the Sky Replacement Group to 50%.)
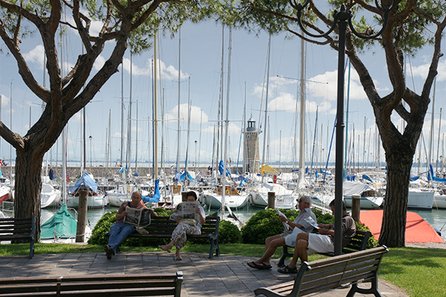

Figure 11. Comparison of replaced sky by manual procedure (left) and new tool (right)
In the following paragraphs, I look at some of the differences between these two versions.
Bleeding effects
Most of the differences between the two versions can be explained by the sky mask that is produced by each procedure. The Sky mask that I generated during the tutorial above is (except for a 1-pixel feather) strictly black-white, the one from the new tool is not: it contains grays in many gradations. Look at figure 12 for a comparison of just an example area. Left, mask and image from the manual procedure. Right, from the automatic procedure.


Figure 12. Mask and resulting image from manual procedure (left) and new tool (right)
Have a close look at the rightmost mast in these fragments. In the manually created mask (top left), it is pitch black. In the other one (top right), it is some mid gray. The consequence of this gray is some bleeding of the sky background. Now look at the two image fragments. Note that in the bottom right version, the mast is lighter along the cloud - in the other version (bottom left), this is not the case. In my opinion, this bleeding should not occur. The manual (left) version is better in this respect.

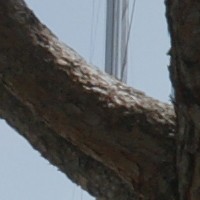
Figure 13. Fragments of tree from manual procedure (left) and new tool (right)
Something similar is seen in the lighter areas of the trees. Have a look at figure 13. Again, left the version resulting from the manual procedure, right the automatically generated version. What happened to the light, reflected parts? In the version that the tool produced, they have gotten a cyanish look. One could explain this as reflection from the now blue sky, but no, the manually created version retained the original color of the tree and looks undoubtedly better.
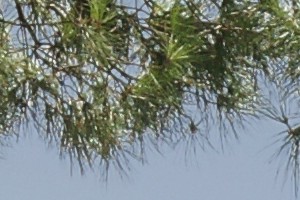

Figure 14. Needles as produced by manual procedure (left) and new tool (right)
Now what about the pine needles? Figure 14 shows a comparison. Although they look pretty different, I wouldn’t decide which is better. I like the white sparkles of the left version (from the manual procedure) but in reality they are not quite right. When we increase opacities of the new skies to 100%, the whites start to look plain wrong in the left version, while the right version retains believability.
All in all, I prefer the result of the manual procedure with regards to how the replaced sky blends into the rest of the image. But it’s not a clean sweep, and in different images the verdict may go the other way.
The fading problem
Now have a look at figure 15, a comparison of an area at the top of the image. Left: manual procedure. Right: automatic tool.


Figure 15. Fading problem from new Sky Replacement tool (right), compared to manual procedure (left)
What happened to the nice blue sky in the right version? Well, this is the result of the “Shift Edge” setting on the Sky Replacement properties window which I had left untouched (set to 0 on a scale of -100 to +100). Now let’s assume I don’t like this gray background in the top areas of the image (which I don't); I have to move the slider rightwards to reduce or even eliminate the effect. See what happens when Shift Edge is moved to 100 (figure 16).

Figure 16. Effect of setting Shift Edge to +100
The gray background in the top areas have now been eliminated but the bleeding effects that I showed in the previous paragraph have become even stronger. The lighter parts of the tree have become distinctly blue, and much of the masts and ropes is vanishing in the sky. In fact, the best look is attained when Shift Edge is at or around 0, so it seems like we have to accept the gray fading at the image edges.
Any conclusions?
As this is basically a tutorial, I don’t want to draw any hard conclusions as to which of the two procedures works better. I haven’t done enough testing to do this anyway. For the chosen test image however, I definitely prefer the result of the manual method. In my opinion, it is worth the extra minute or two, mostly spent on constructing a good sky mask. In cases where you don’t succeed in getting a suitable mask, or if you are in a hurry, the automatic procedure may be a good alternative. If the sky you want to replace is blue, the automatic procedure may be the only choice you have. And if, on the other hand, you don’t use the latest Photoshop version, there is no alternative than to use some manual procedure.
Gerald Bakker, 1 Jan. 2021
Tutorials and Actions
